

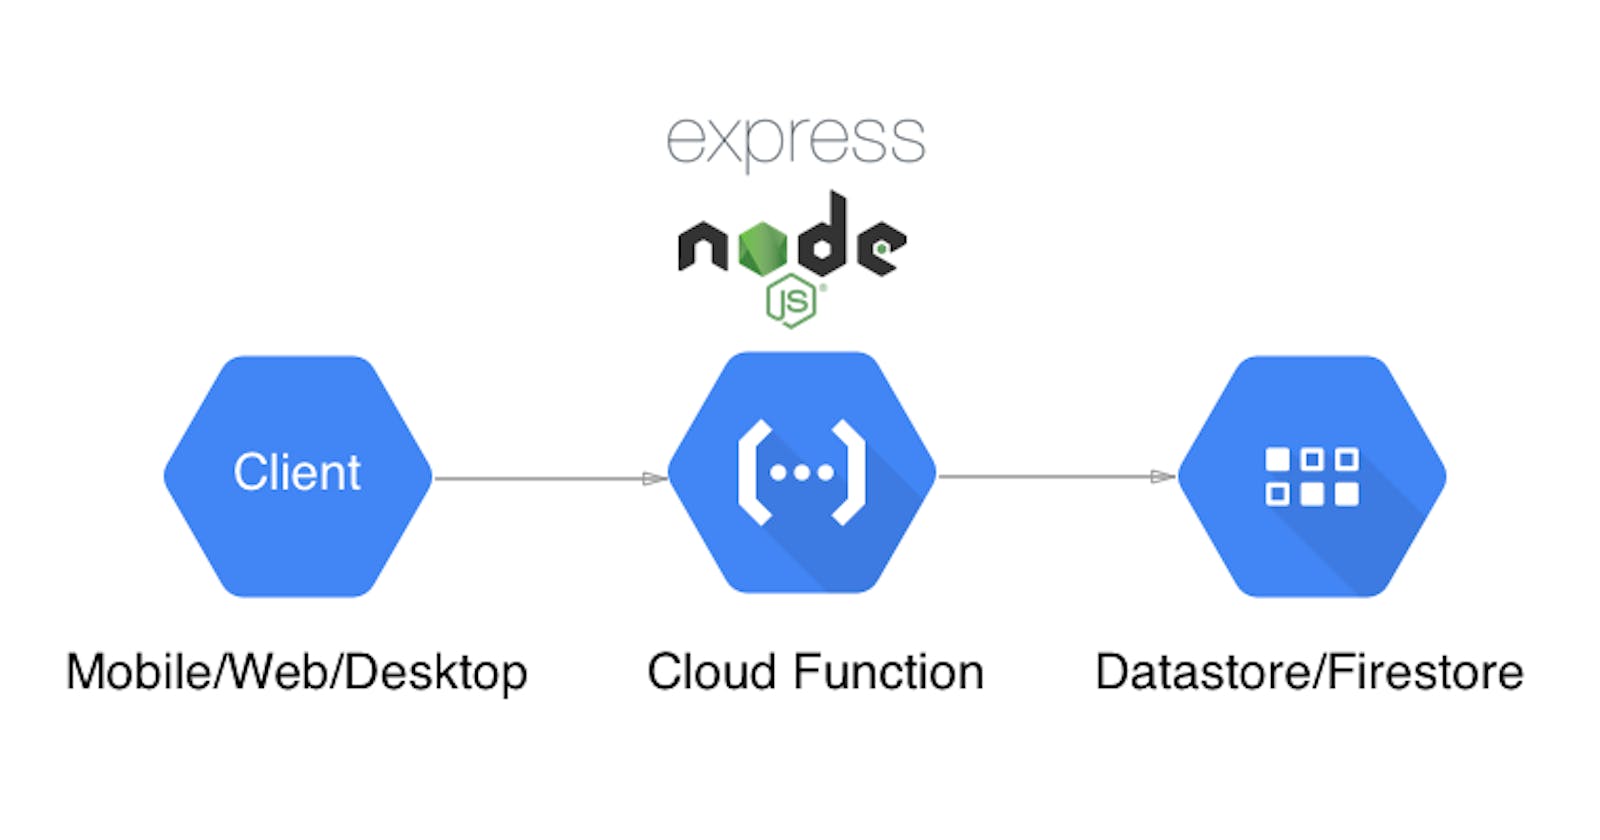


In the previous article, we were able to setup a Cloud function which responds to HTTP requests. In this article, we will be building a REST API on top of our previous setup using Express.js and Cloud Firestore
Quick note: Most of our work will be inside of the
functionsfolder of the project, you should open a terminal in that folder
Express
Express is a fast lightweight web framework built on NodeJS , it offers a vast collection of HTTP methods and middleware, routing, templating and other utilities without obscuring the base NodeJS features.
Adding Express to our Cloud Function
From the terminal, in the functions directory, install express.
npm install express --save
We'll setup the express app and rename our function from helloWorld to api, then the src/index.ts file becomes:
import * as functions from "firebase-functions";
import * as express from "express";

// initialize the express framework
const app = express();

// define the `helloWorld` route
app.get("/helloWorld", (req, res) => {
  res.send("Hello from the express app");
});

// hookup our http function to respond with the express framework
export const api = functions.https.onRequest(app);
In the code snippet above, we've delegated our routing, request and response flow to express, we can define as much as many routes that we need, we can serve up static content or render dynamic html.
When we run the npm run serve command from the functions directory,
➜  functions ✗ npm run serve

> functions@ serve <the_source_code_path_on_your_machine>
> npm run build && firebase serve --only functions


> functions@ build <the_source_code_path_on_your_machine>
> tsc


=== Serving from <the_source_code_path_on_your_machine>...

i  functions: Preparing to emulate functions.
✔  functions: api: http://localhost:5000/<your_firebase_project_id>/us-central1/api
notice the function url changes, it reflects the new name of the function. The url pattern is defined below <development_url>/<function_name>. So in our case
development_url =  "http://localhost:5000/<your_firebase_project_id>/us-central1"
function_name = "api"
In order to access any routes that we have defined with the express framework, we need to add the route name to the end of the URL like this <development_url>/<function_name>/<route_name>.
In our example, we have defined the /helloWorld route, so to access it we need to do http://localhost:5000/<your_firebase_project_id>/us-central1/api/helloWorld.
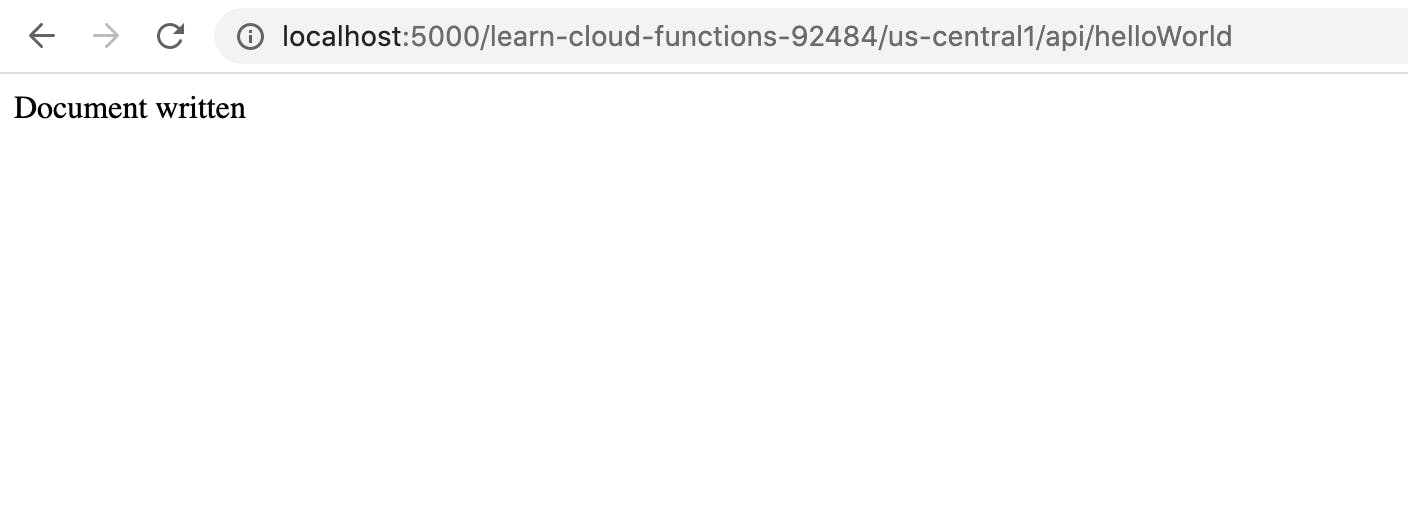
Copy the url that shows up in your terminal, add the /helloWorld route to it, paste in a browser window, then press Enter.
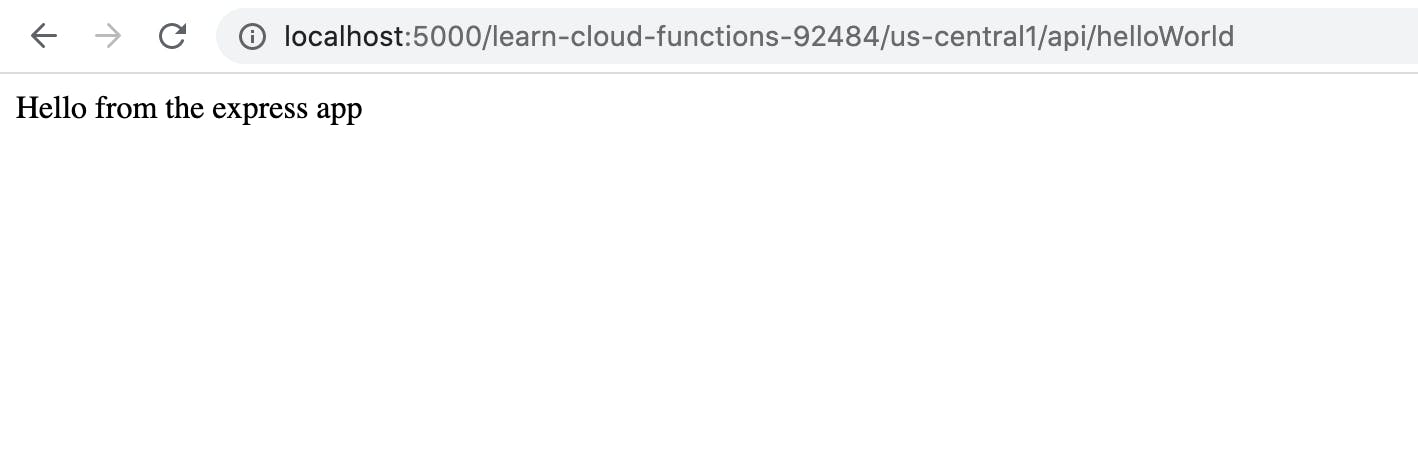 Yaay! Express server is live 🔥
Cloud Firestore
Cloud Firestore is a NoSQL document database that lets you easily store, sync, and query data for your application e.g servers, mobile and web apps - at global scale.
Practically, we could use any database(SQL or NoSQL) for our API, but we're going with Cloud Firestore in order to show how Cloud Functions can connect with existing Google Cloud services. Similar to Cloud Functions, Cloud Firestore can be setup via Firebase or Google Cloud Platform.
Head over to your project dashboard on the Firebase console. Select the "Database"
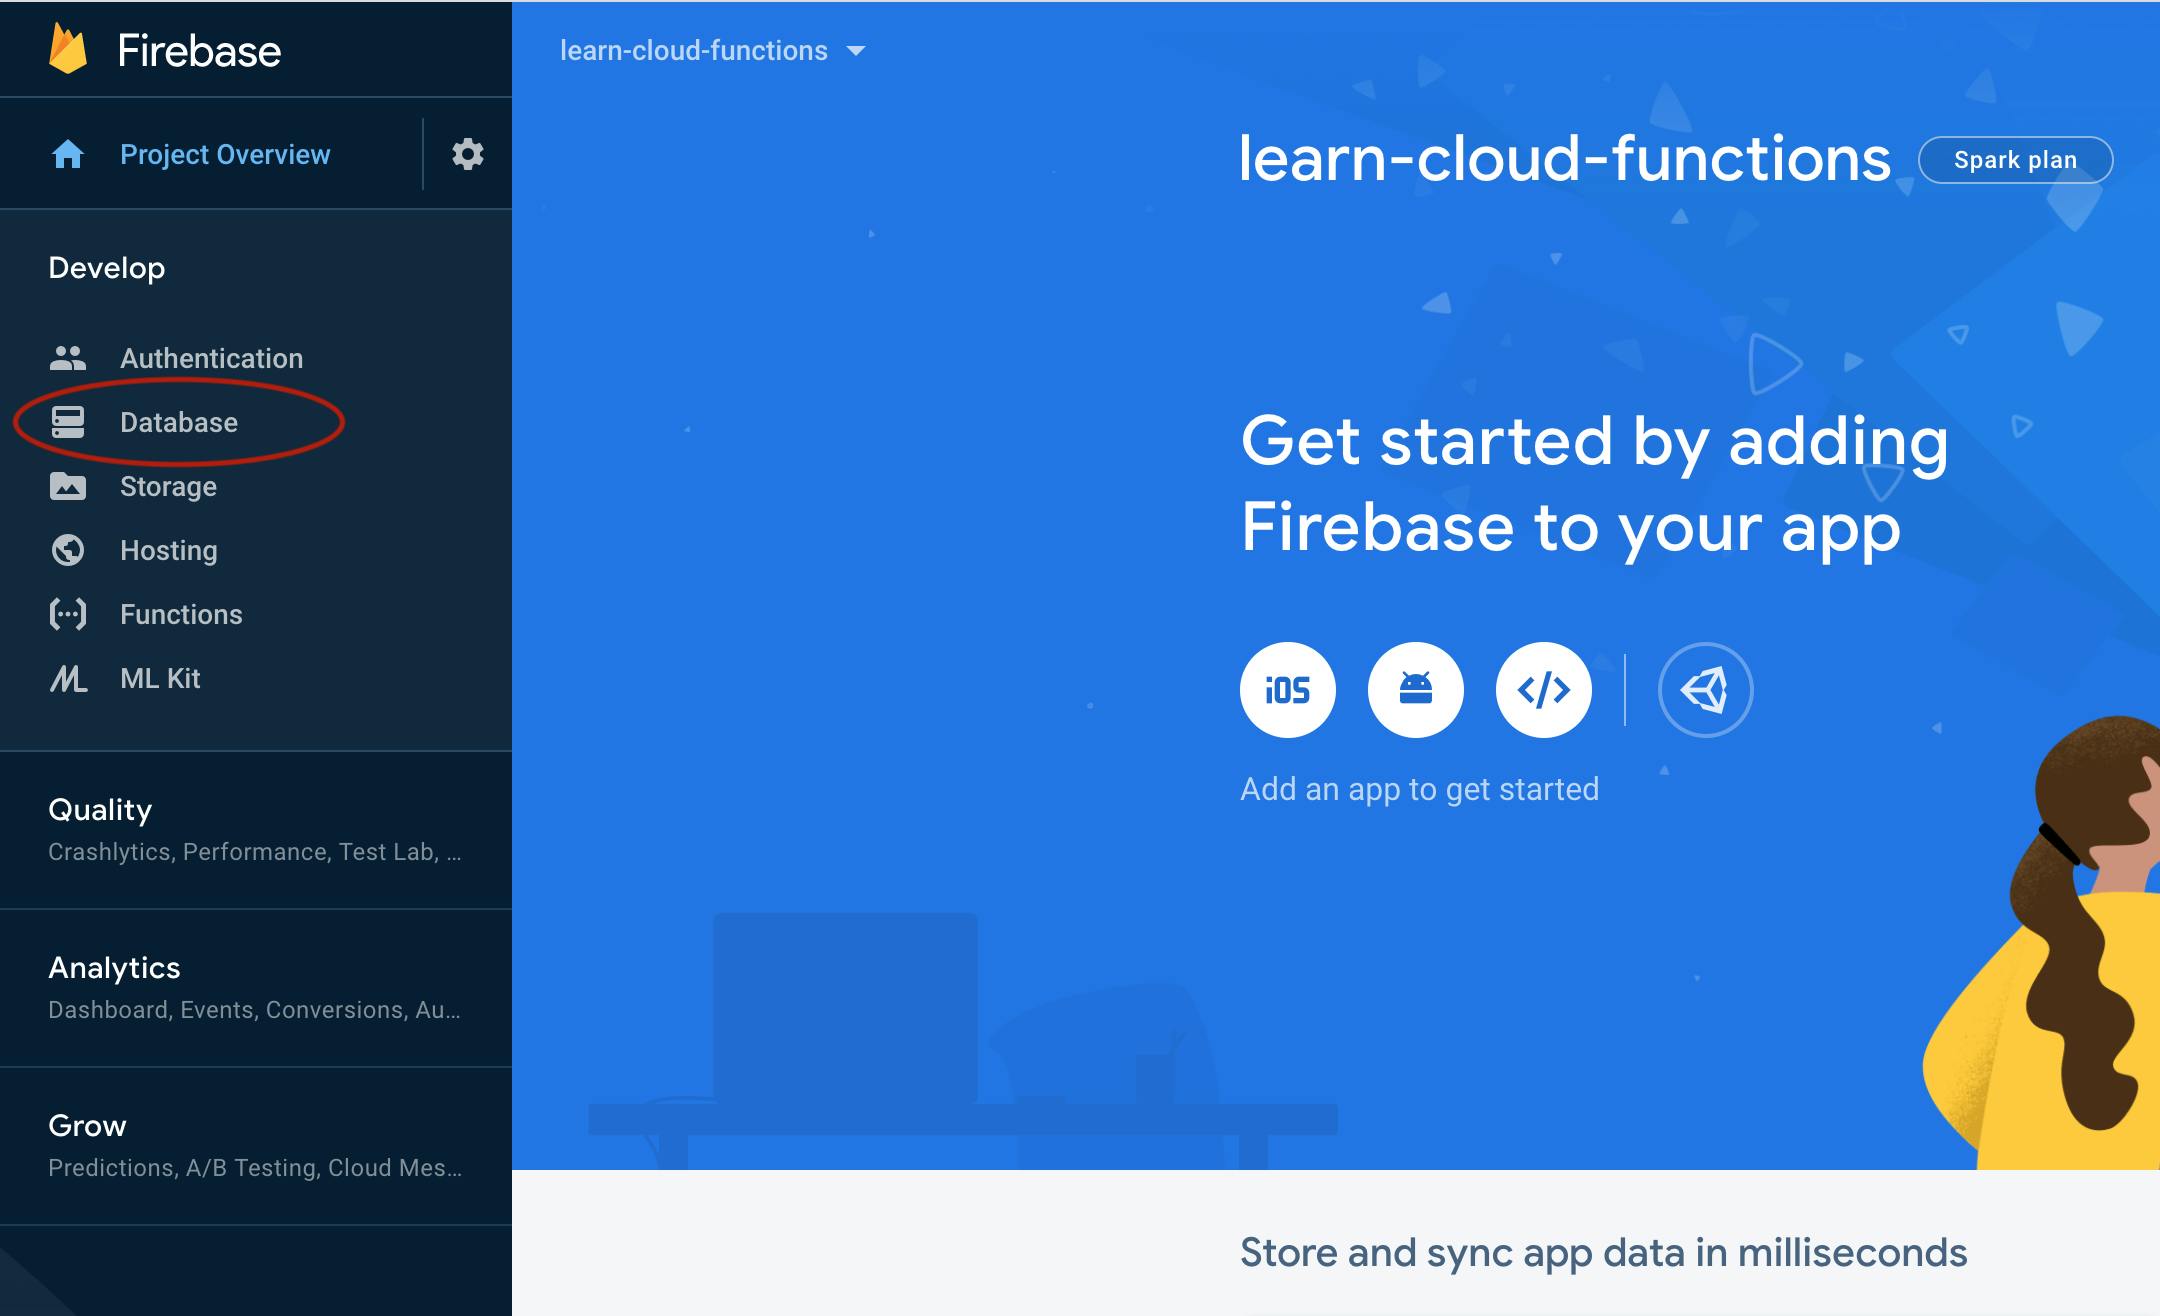
Click the "Create Database" button.

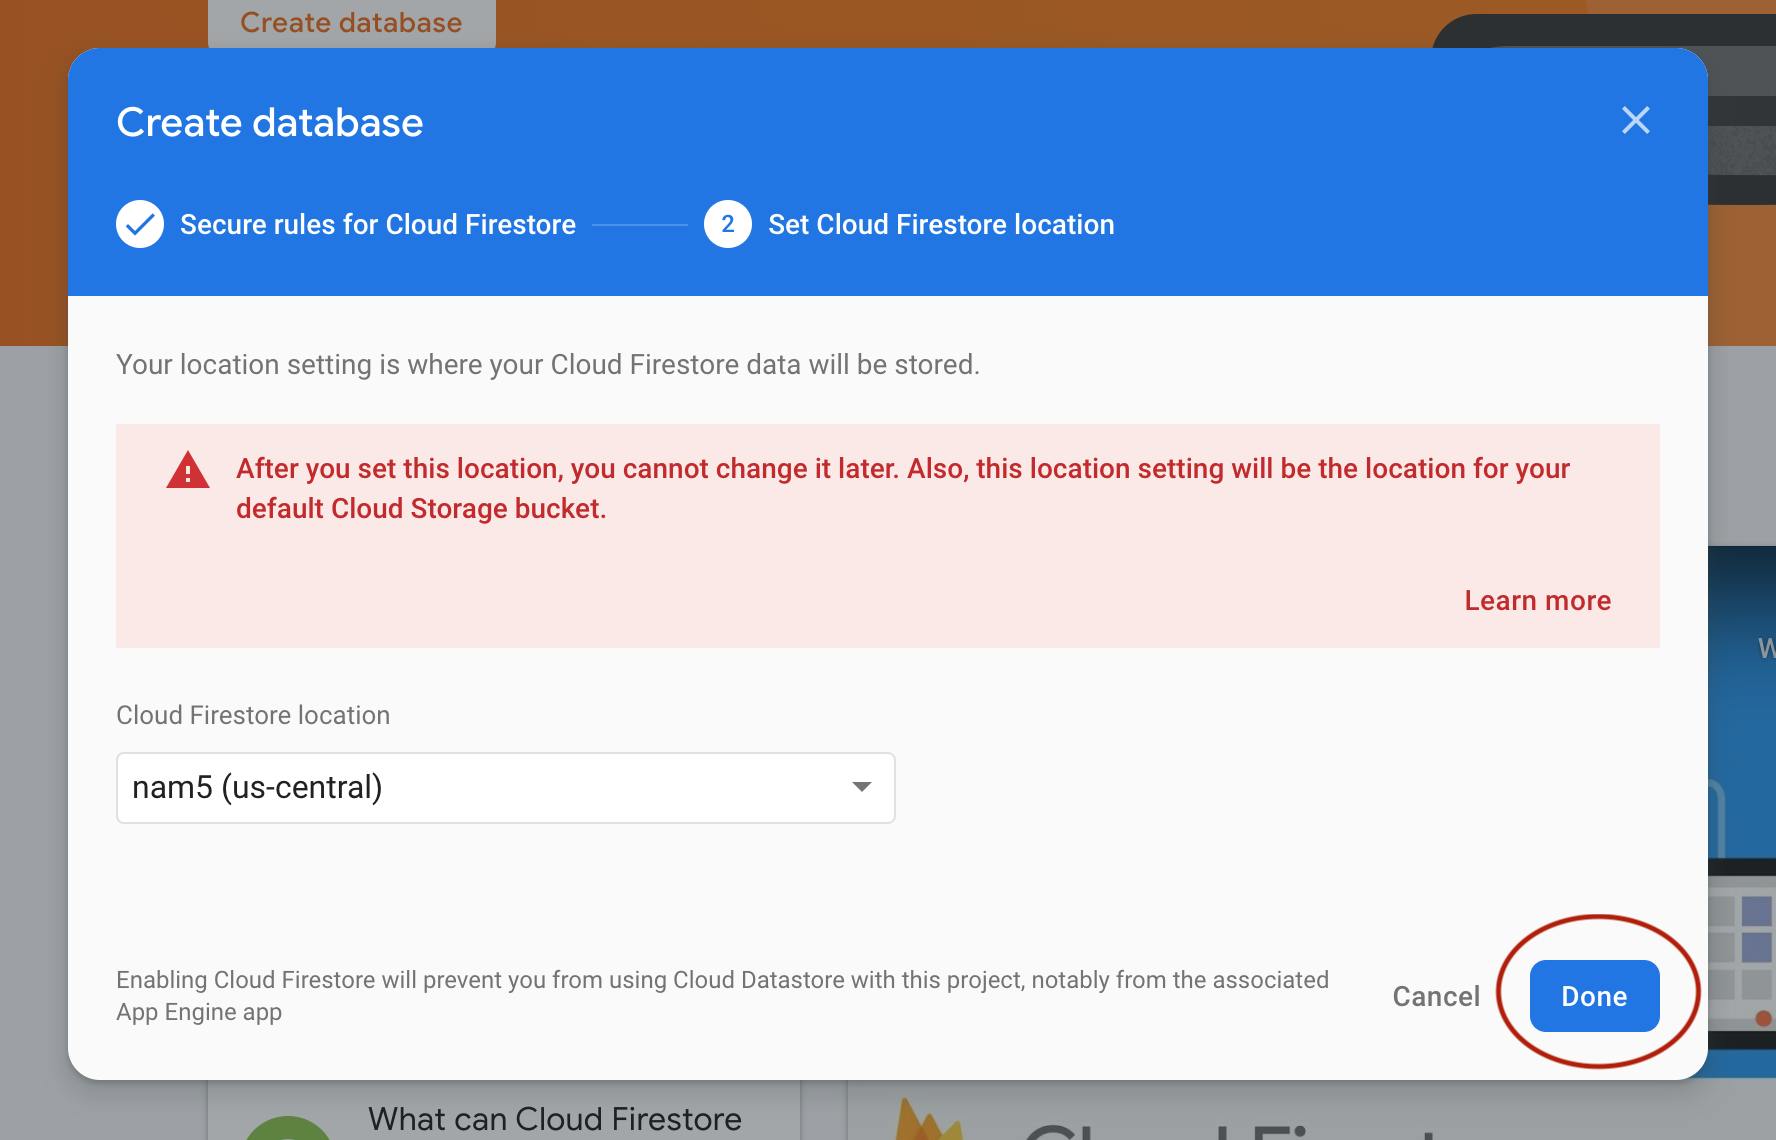
For easy setup, we'll start in Test Mode.
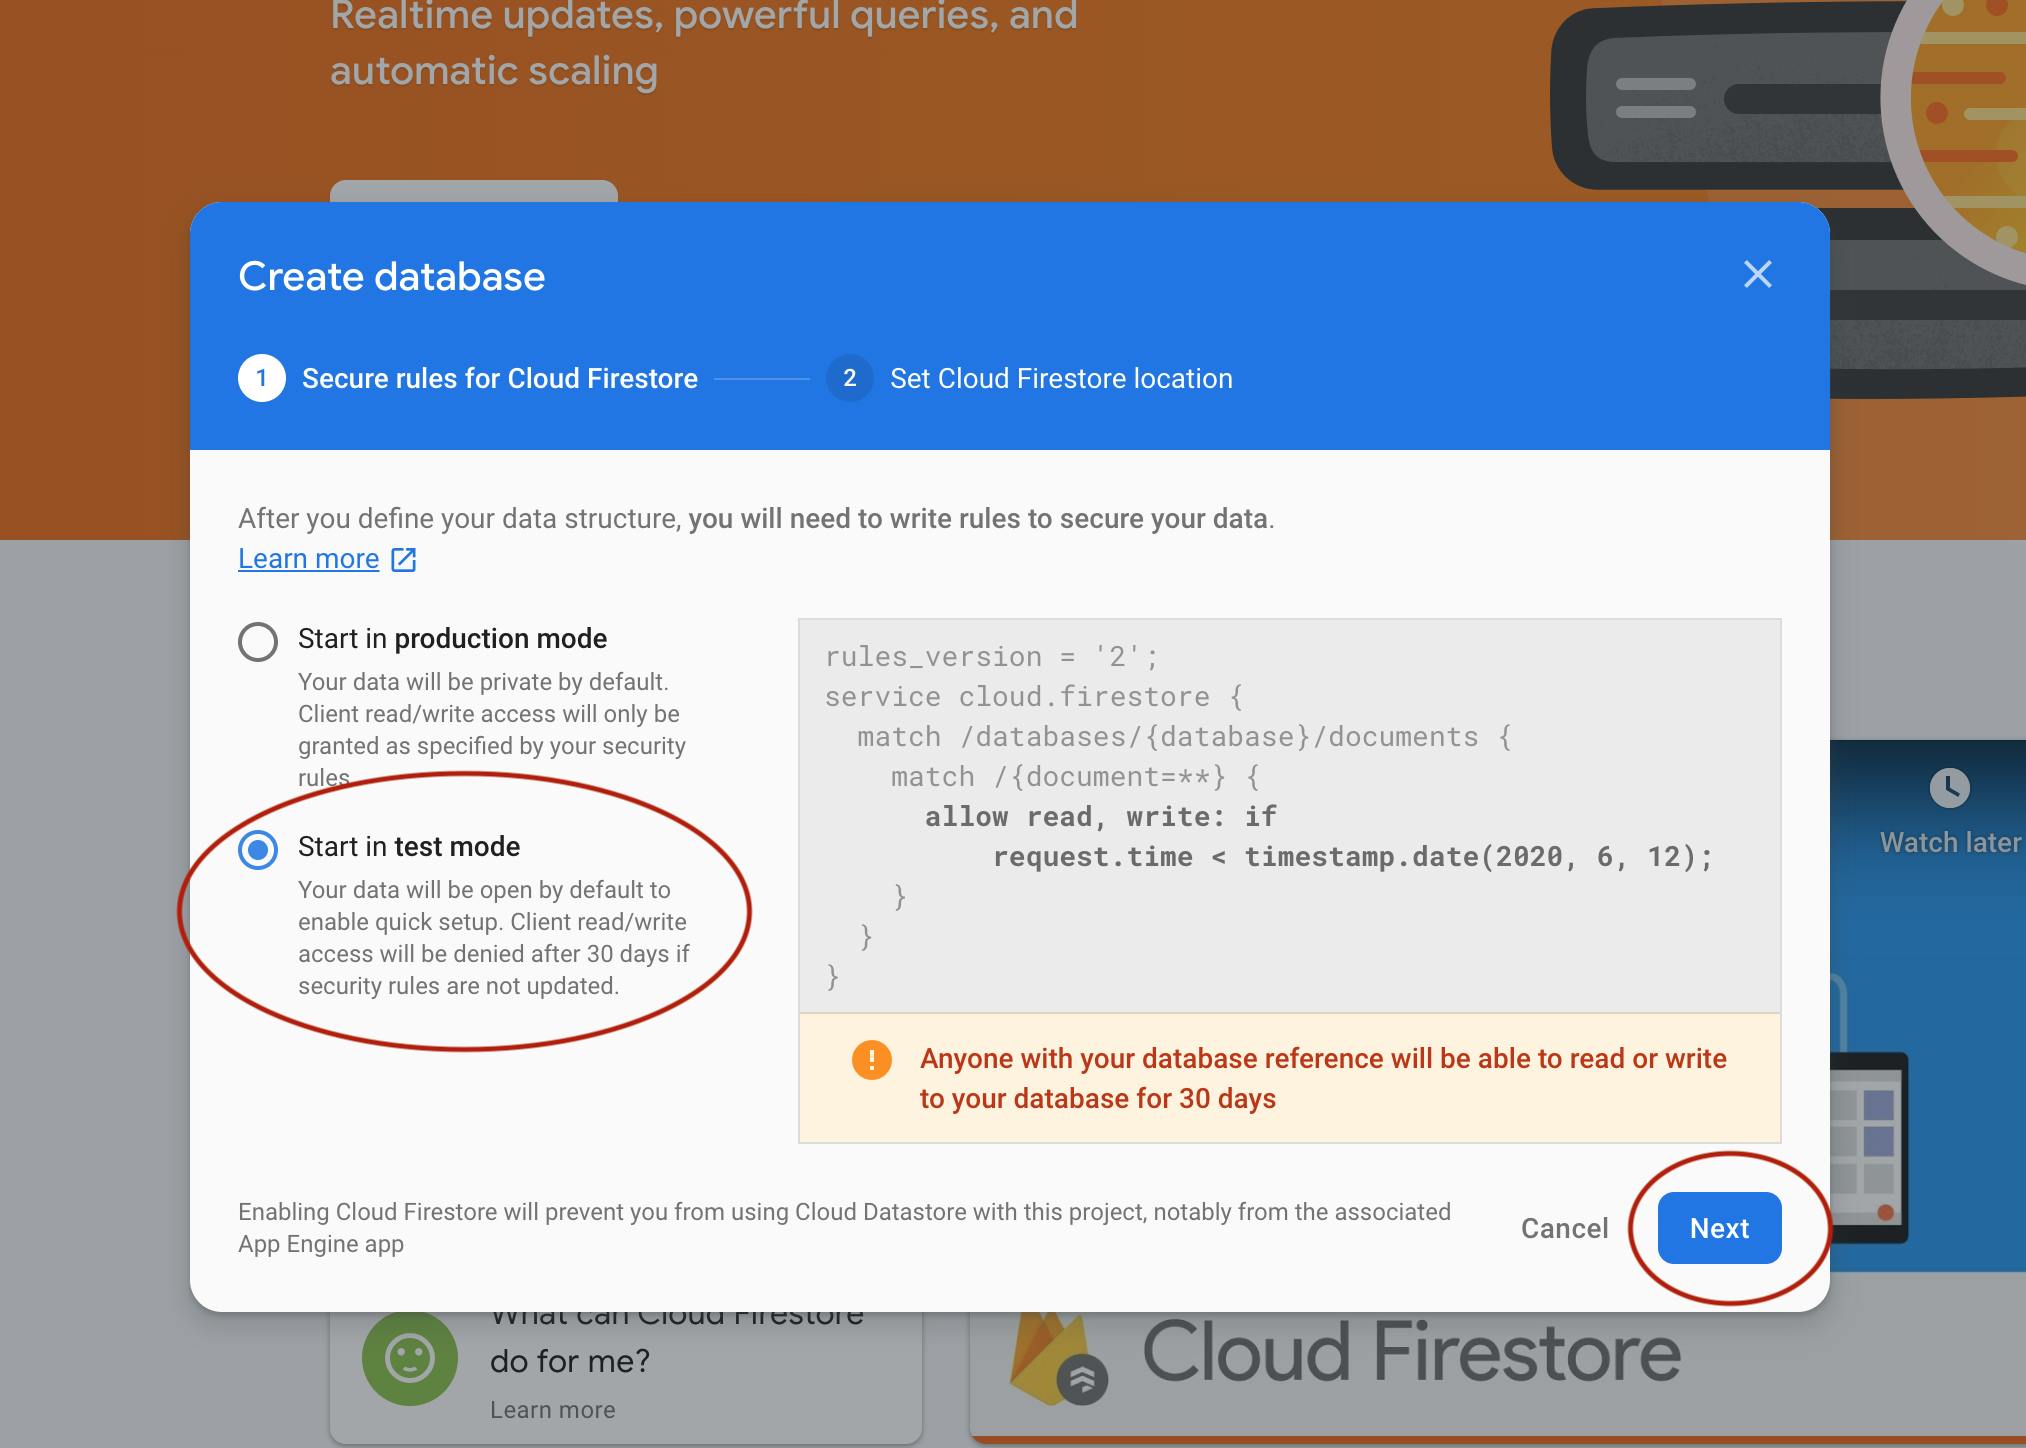
Use the default location that shows up in the Cloud Firestore location dropdown, Click "Done"
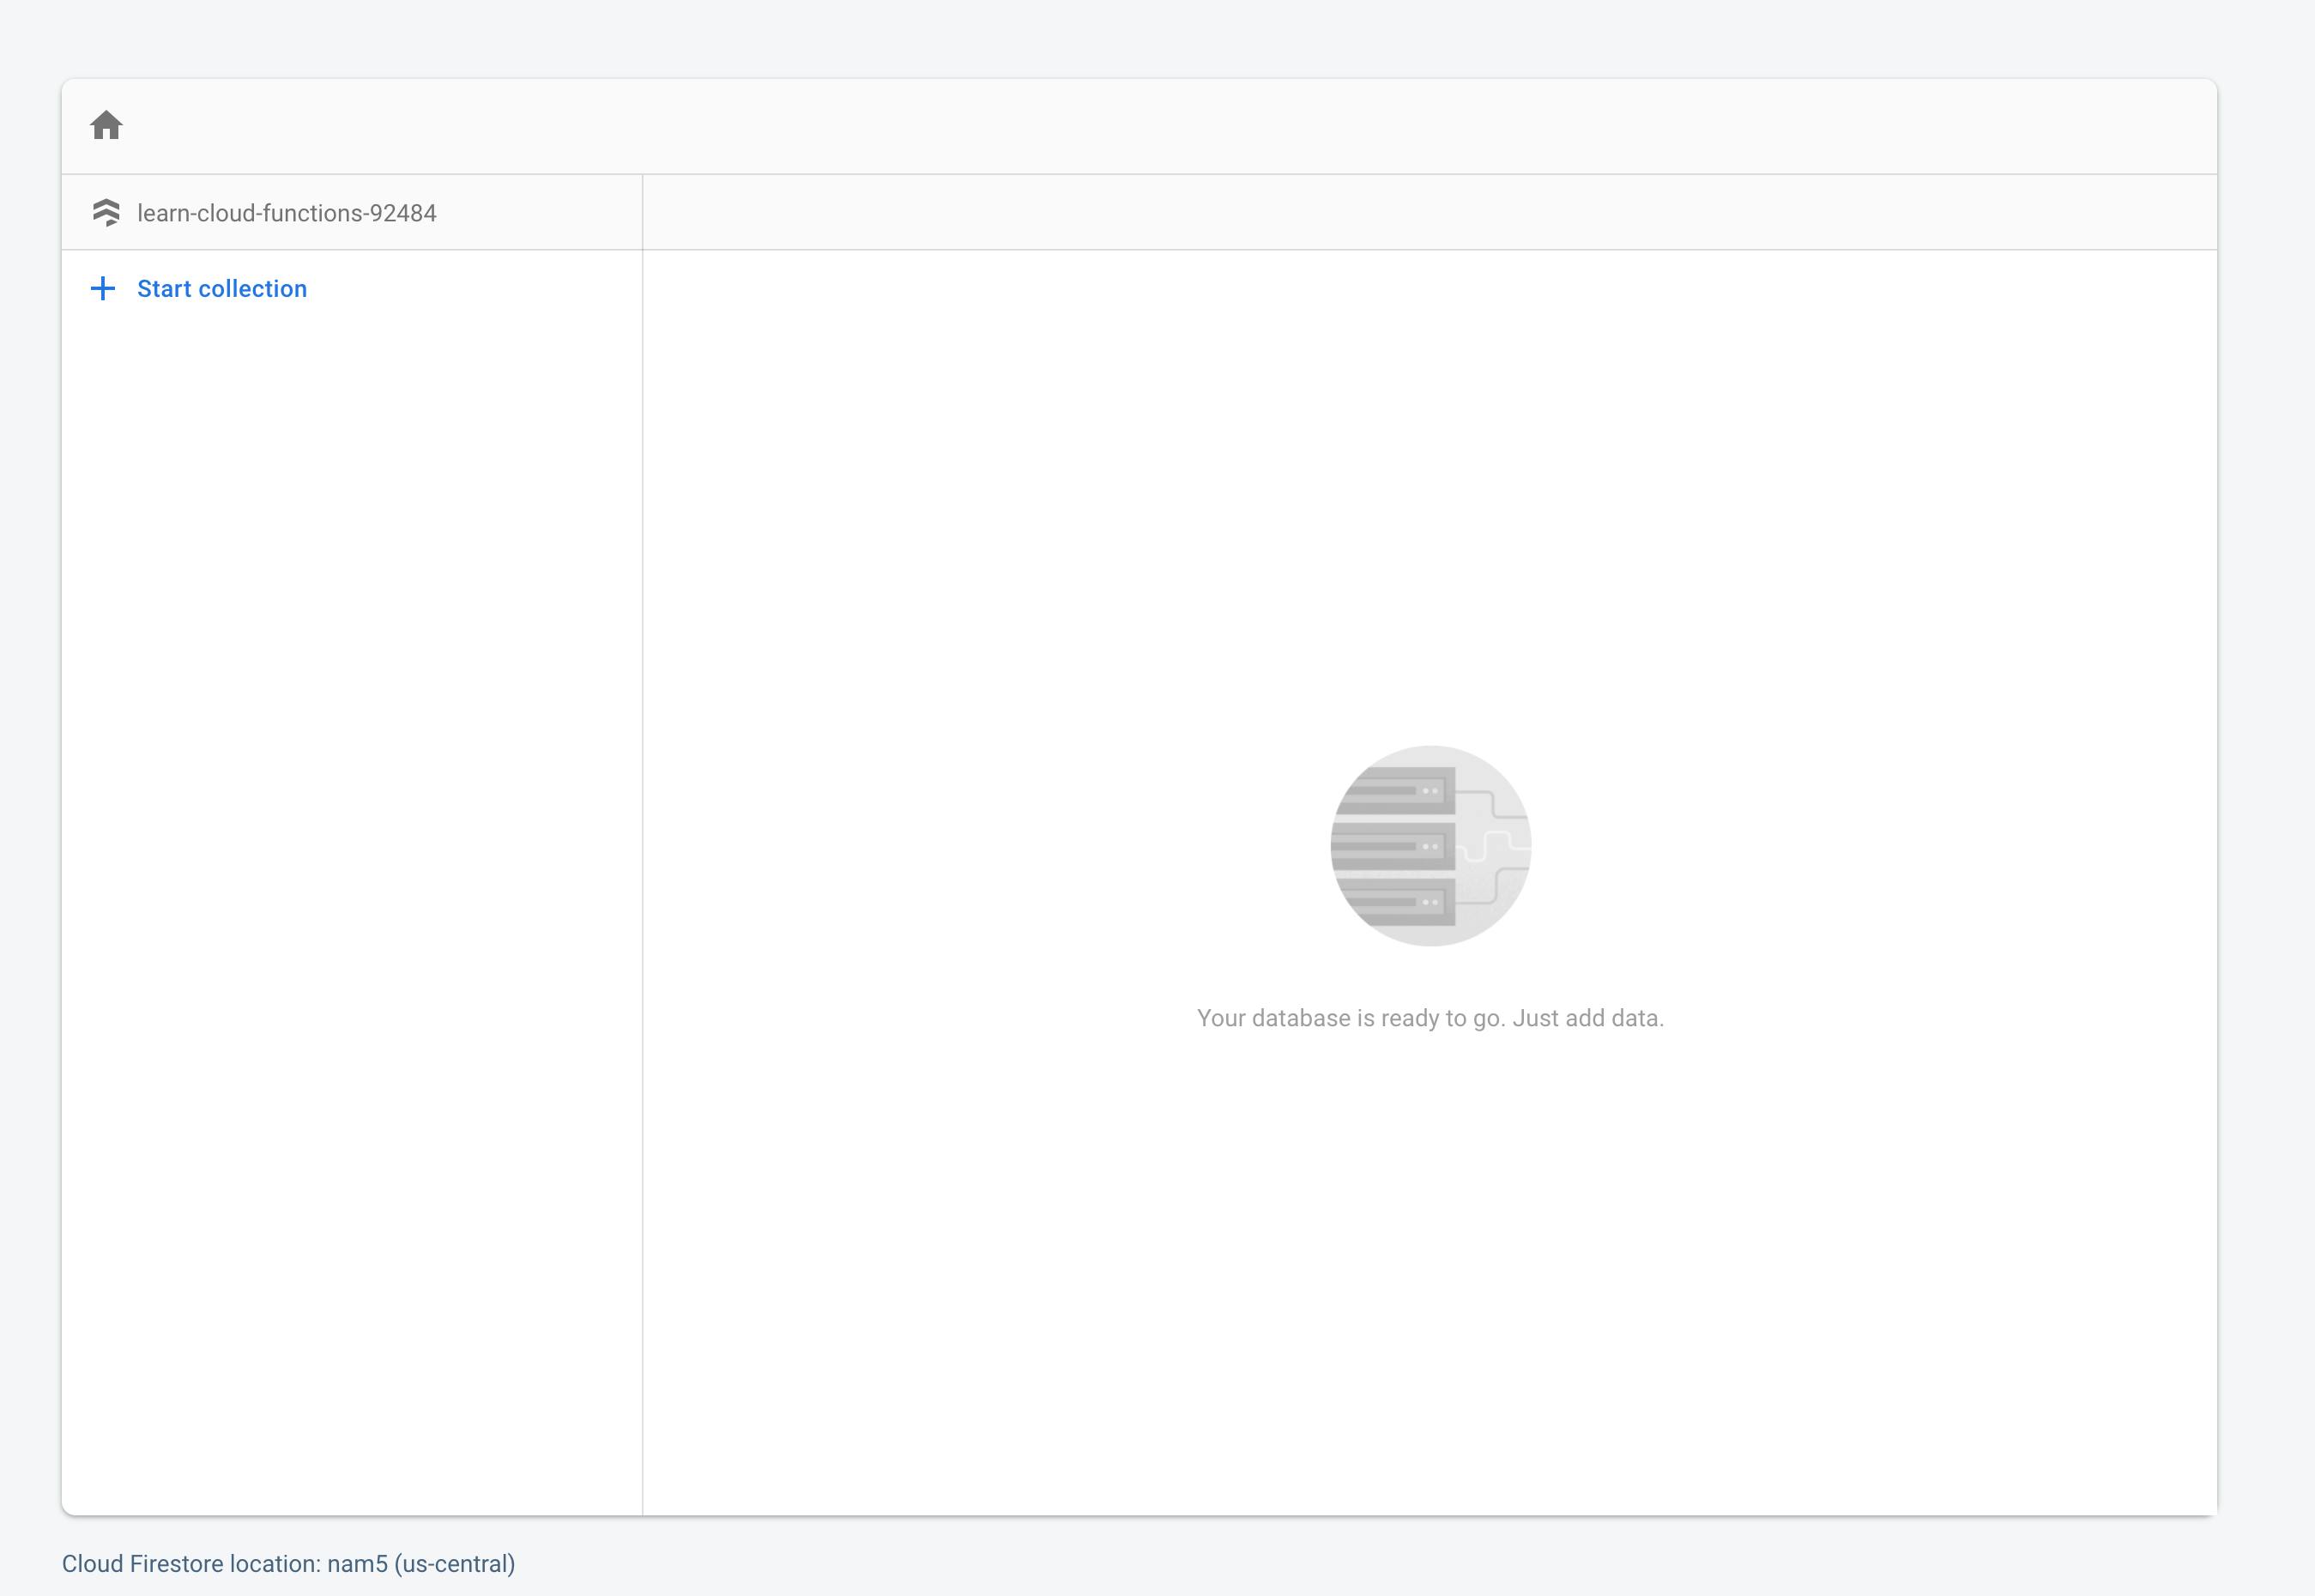
If you can see something similar to the screenshot below, you have successfully provisioned Cloud Firestore for your project.
Now we need to grant our server access to our Cloud Firestore database, Firebase provides a configuration file which makes this process seamless.
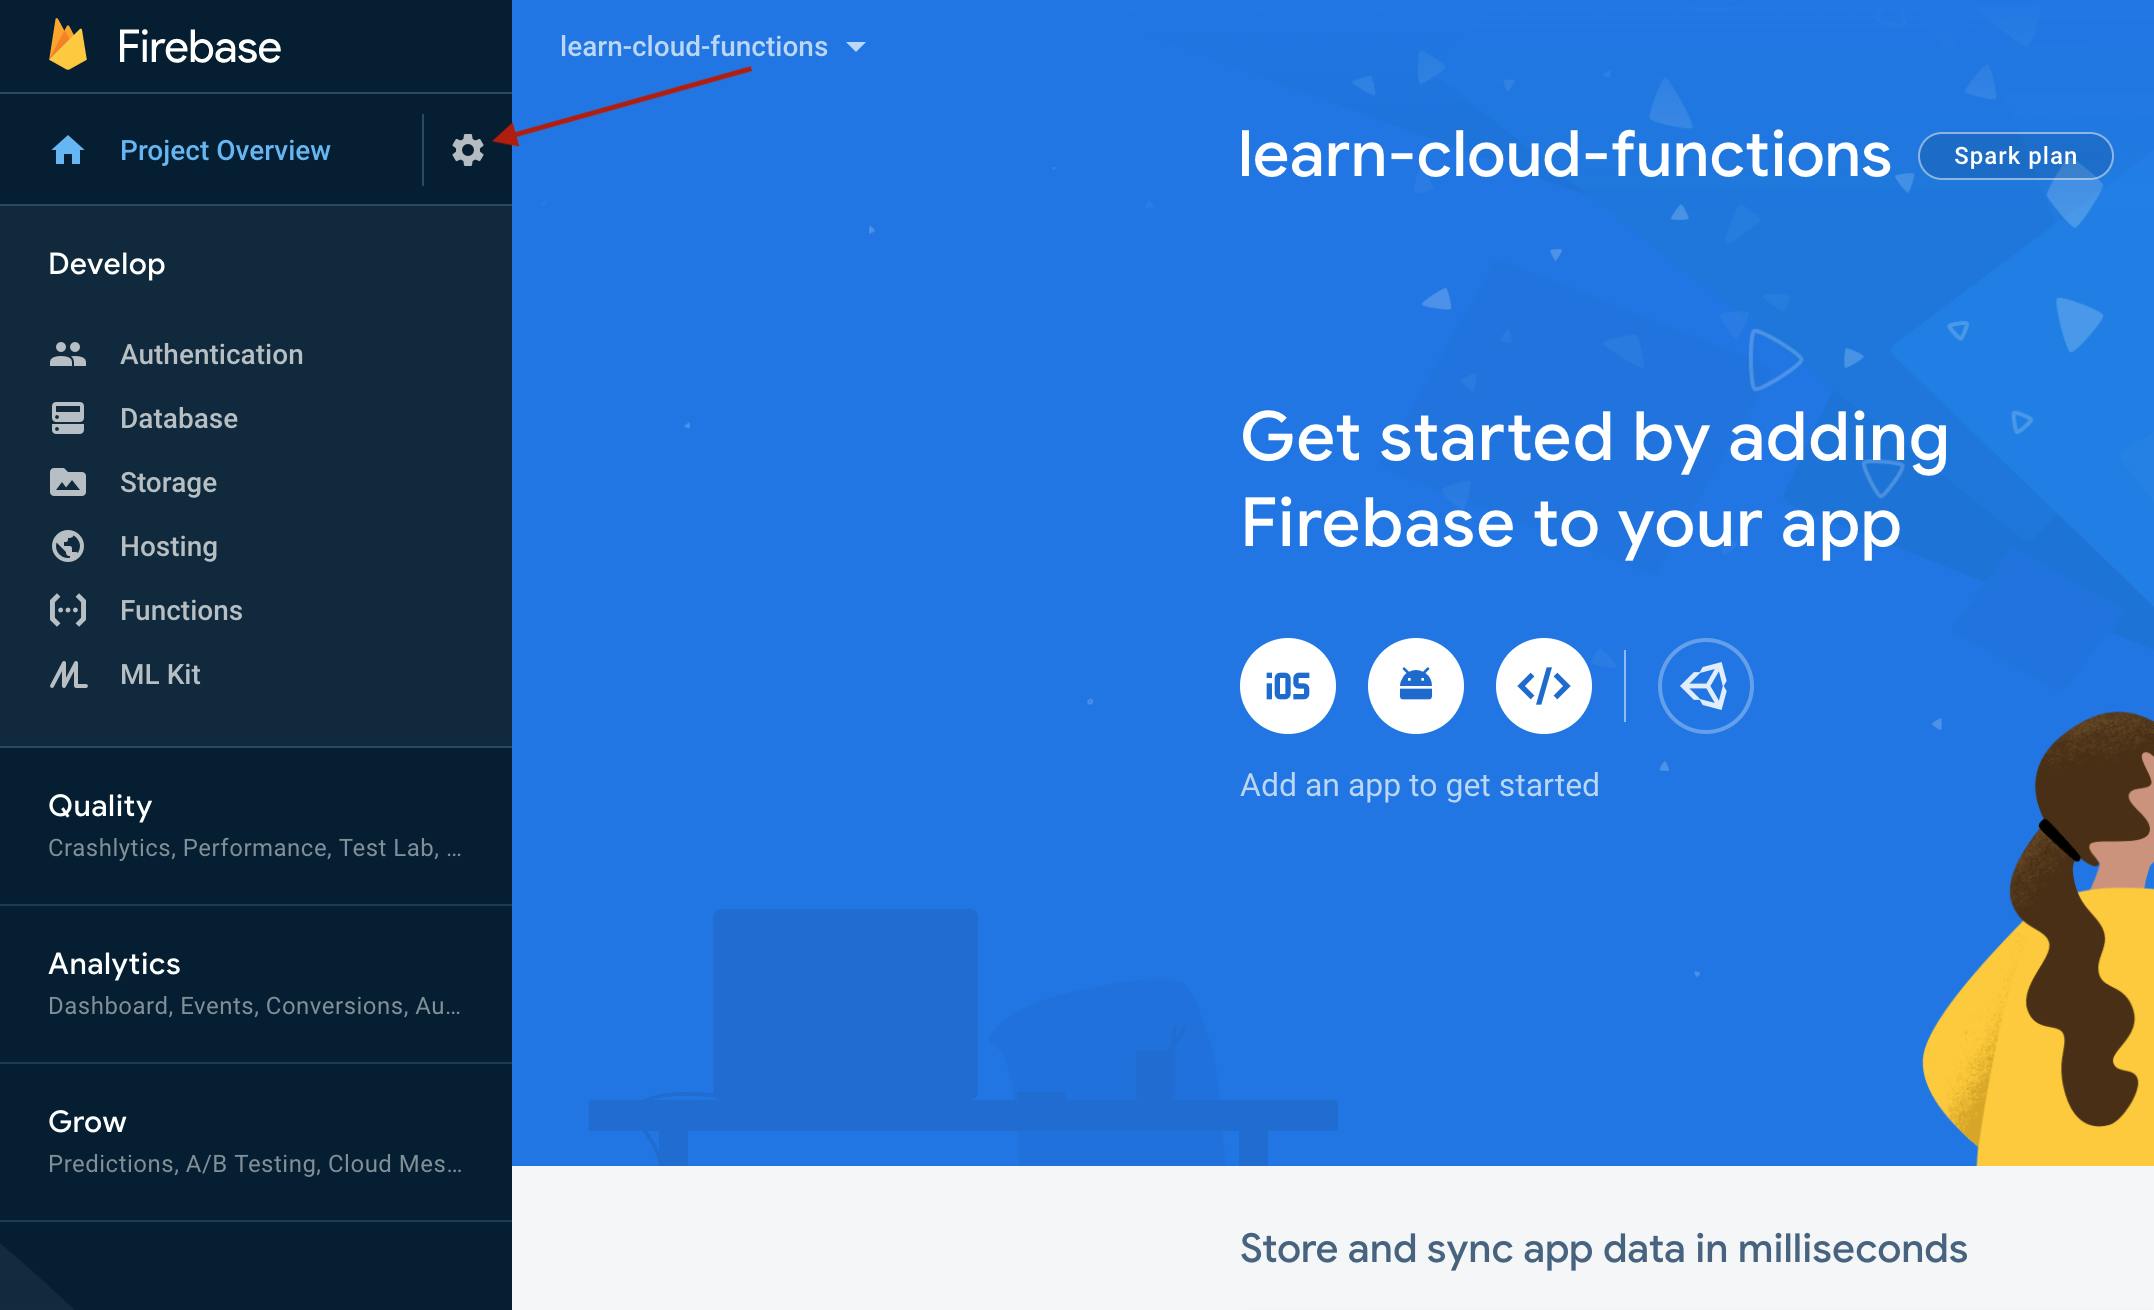
On the project's dashboard, click the "Settings Icon" and select the "Project Settings" option.
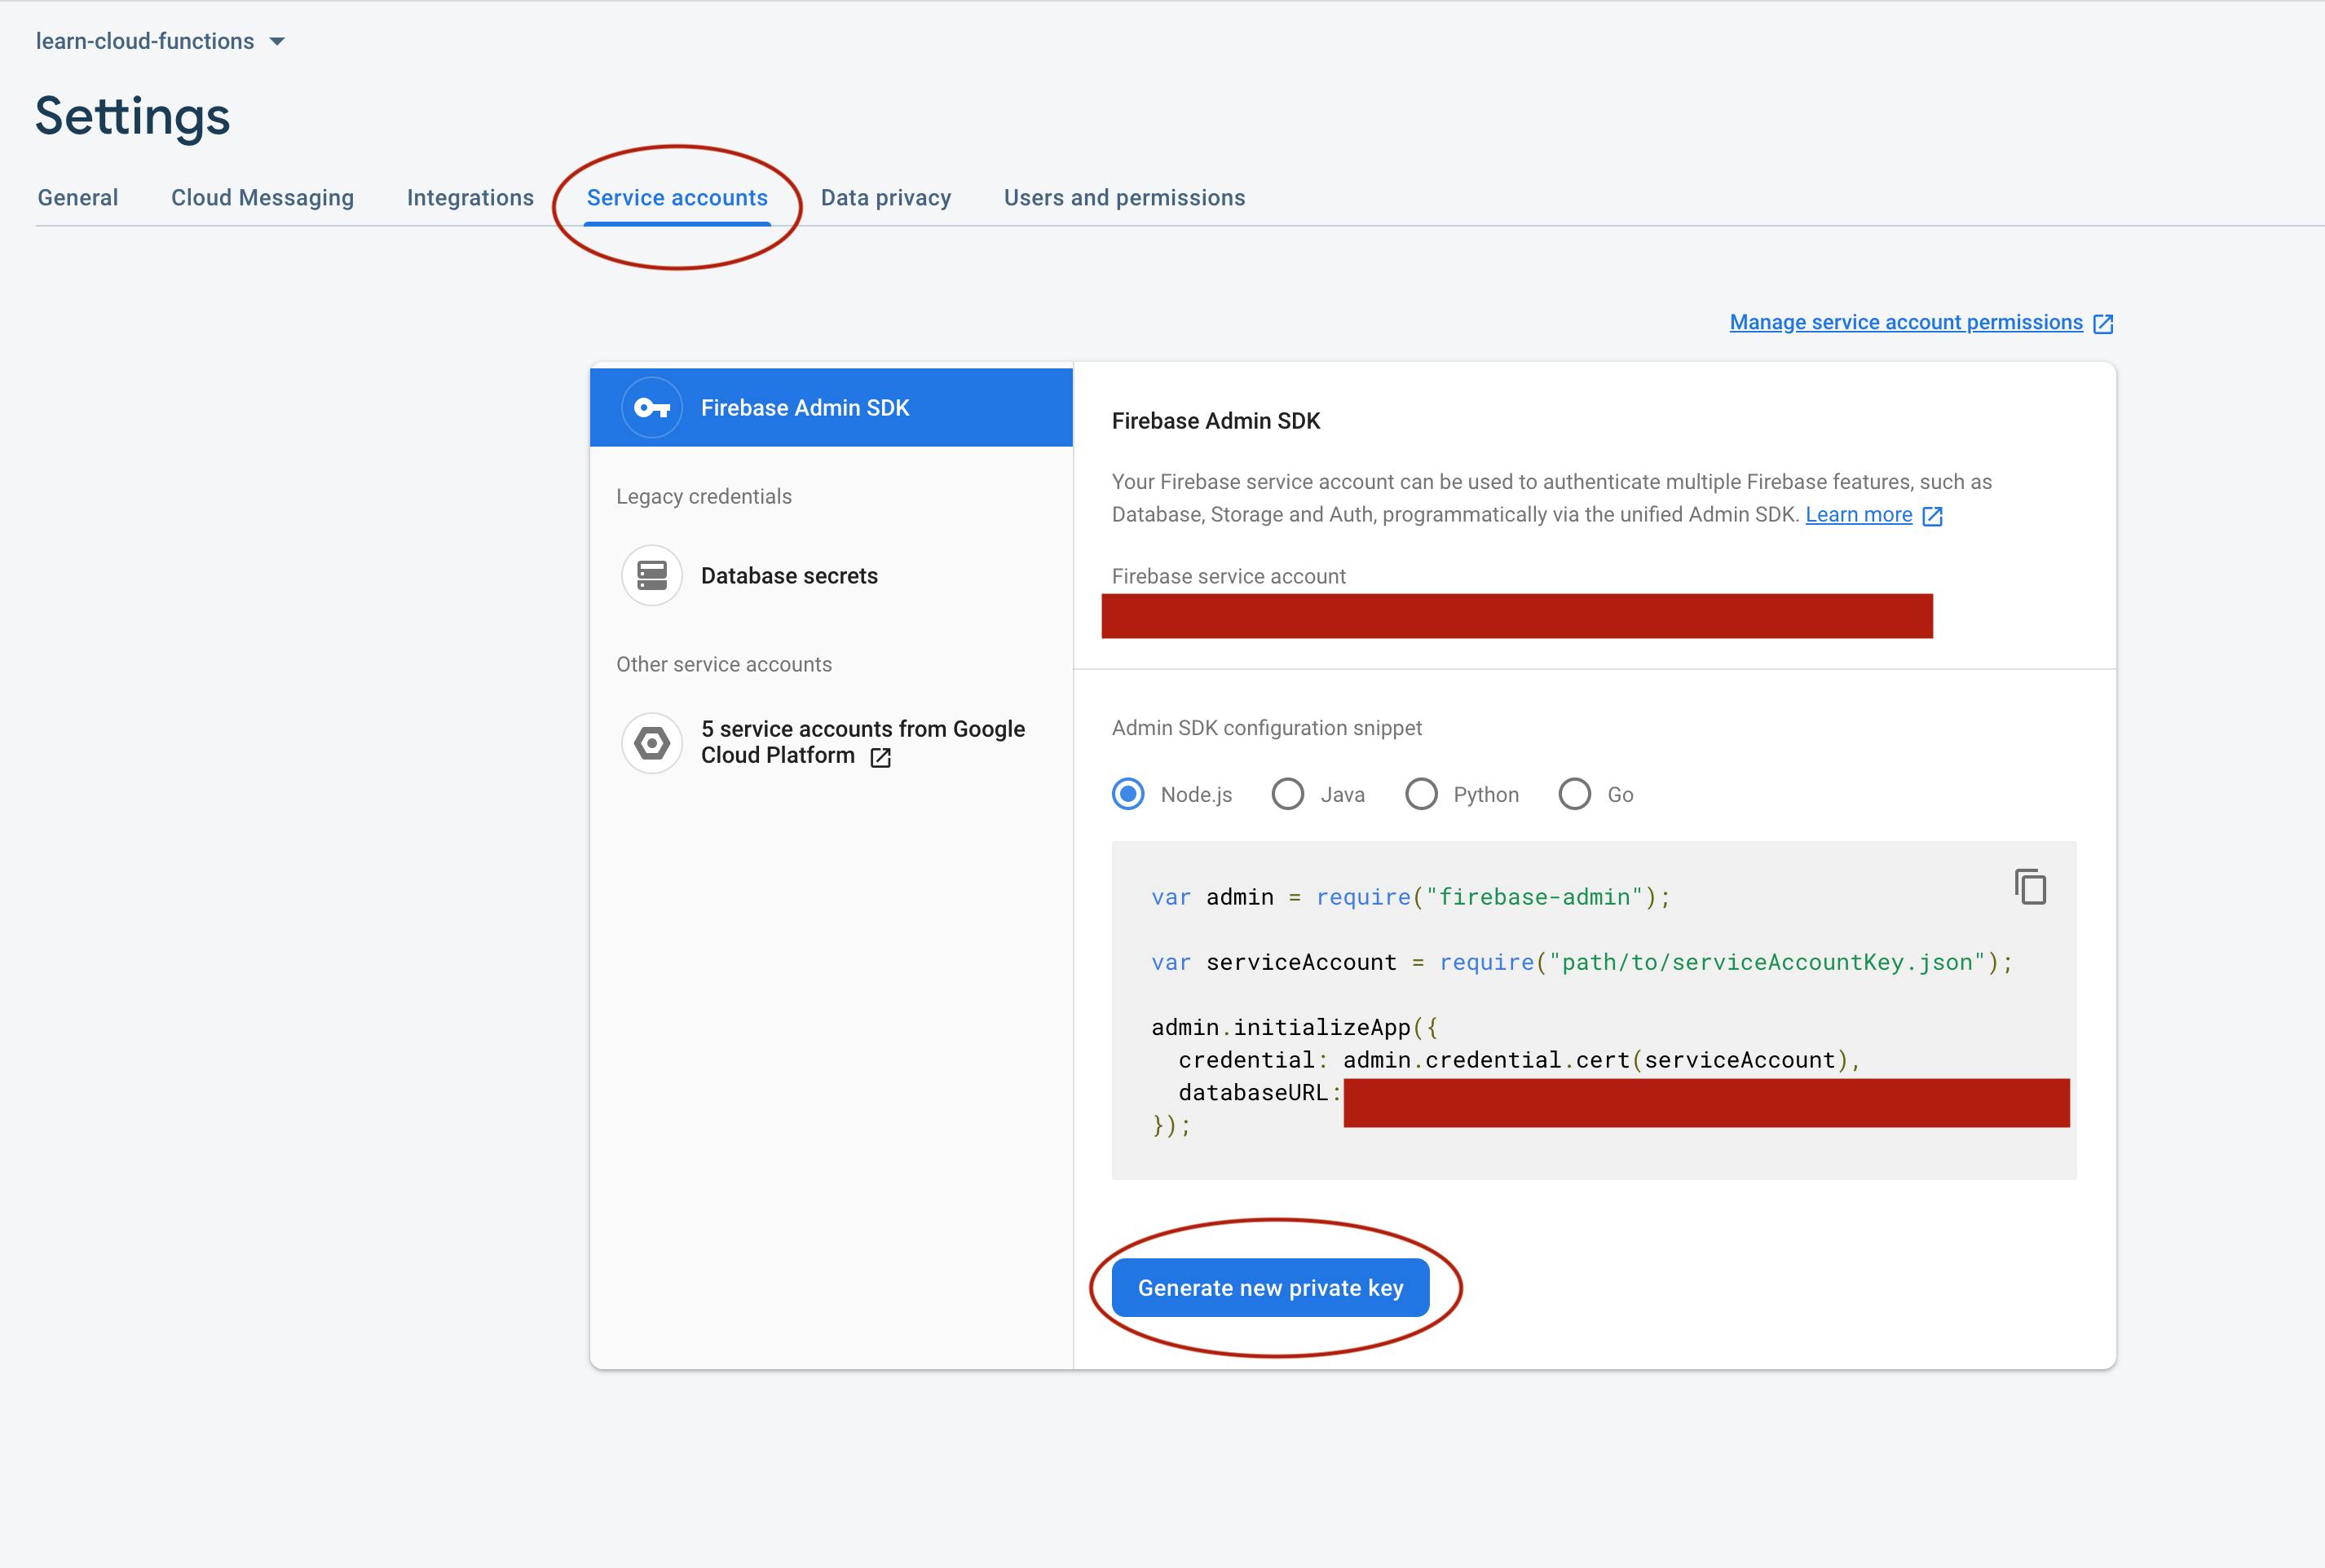
Navigate to the "Service Accounts" tab then click the "Generate New Private Key" button.
Your Firebase service account can be used to authenticate multiple Firebase features, such as Database, Storage and Auth, programmatically via the unified Admin SDK.
This should download a json file that contains the project credentials, move the file into the functions/src folder of your project.
Warning ⚠️ ⚠️ ⚠️ The serviceAccount.json file should never be committed to Git/Github, it must remain secret. If leaked, it can be used by malicious users to access your firebase project.
// functions/src/index.ts
import * as firebaseAdmin from "firebase-admin"; // import the firebase-admin sdk
import * as functions from "firebase-functions";
import * as express from "express";
import * as serviceAccount from "./serviceAccount.json";

// initialize the express framework
const app = express();

// grant the firebase-admin sdk all administrative privileges to our project
firebaseAdmin.initializeApp({
  credential: firebaseAdmin.credential.cert({
    projectId: serviceAccount.project_id,
    clientEmail: serviceAccount.client_email,
    privateKey: serviceAccount.private_key,
  }),
});

//define the `helloWorld` route
app.get("/helloWorld", (req, res) => {
  res.send("Hello from the express app");
});

//hookup our http function to respond with the express framework
export const api = functions.https.onRequest(app);
Pro-Tip: Rename the downloaded service account json file to something like
serviceAccount.json, shorter names are easier to work with.
You should notice that typescript compiler complains about the json file, so we also need to update our tsconfig.json file to resolve json modules.
{
  "compilerOptions": {
    "module": "commonjs",
    "noImplicitReturns": true,
    "noUnusedLocals": true,
    "outDir": "lib",
    "sourceMap": true,
    "strict": true,
    "target": "es2017",
    "resolveJsonModule": true // add this line to tsconfig.json
  },
  "compileOnSave": true,
  "include": [
    "src"
  ]
}
That should be all for the database setup, we can test by writing a sample document to our database.
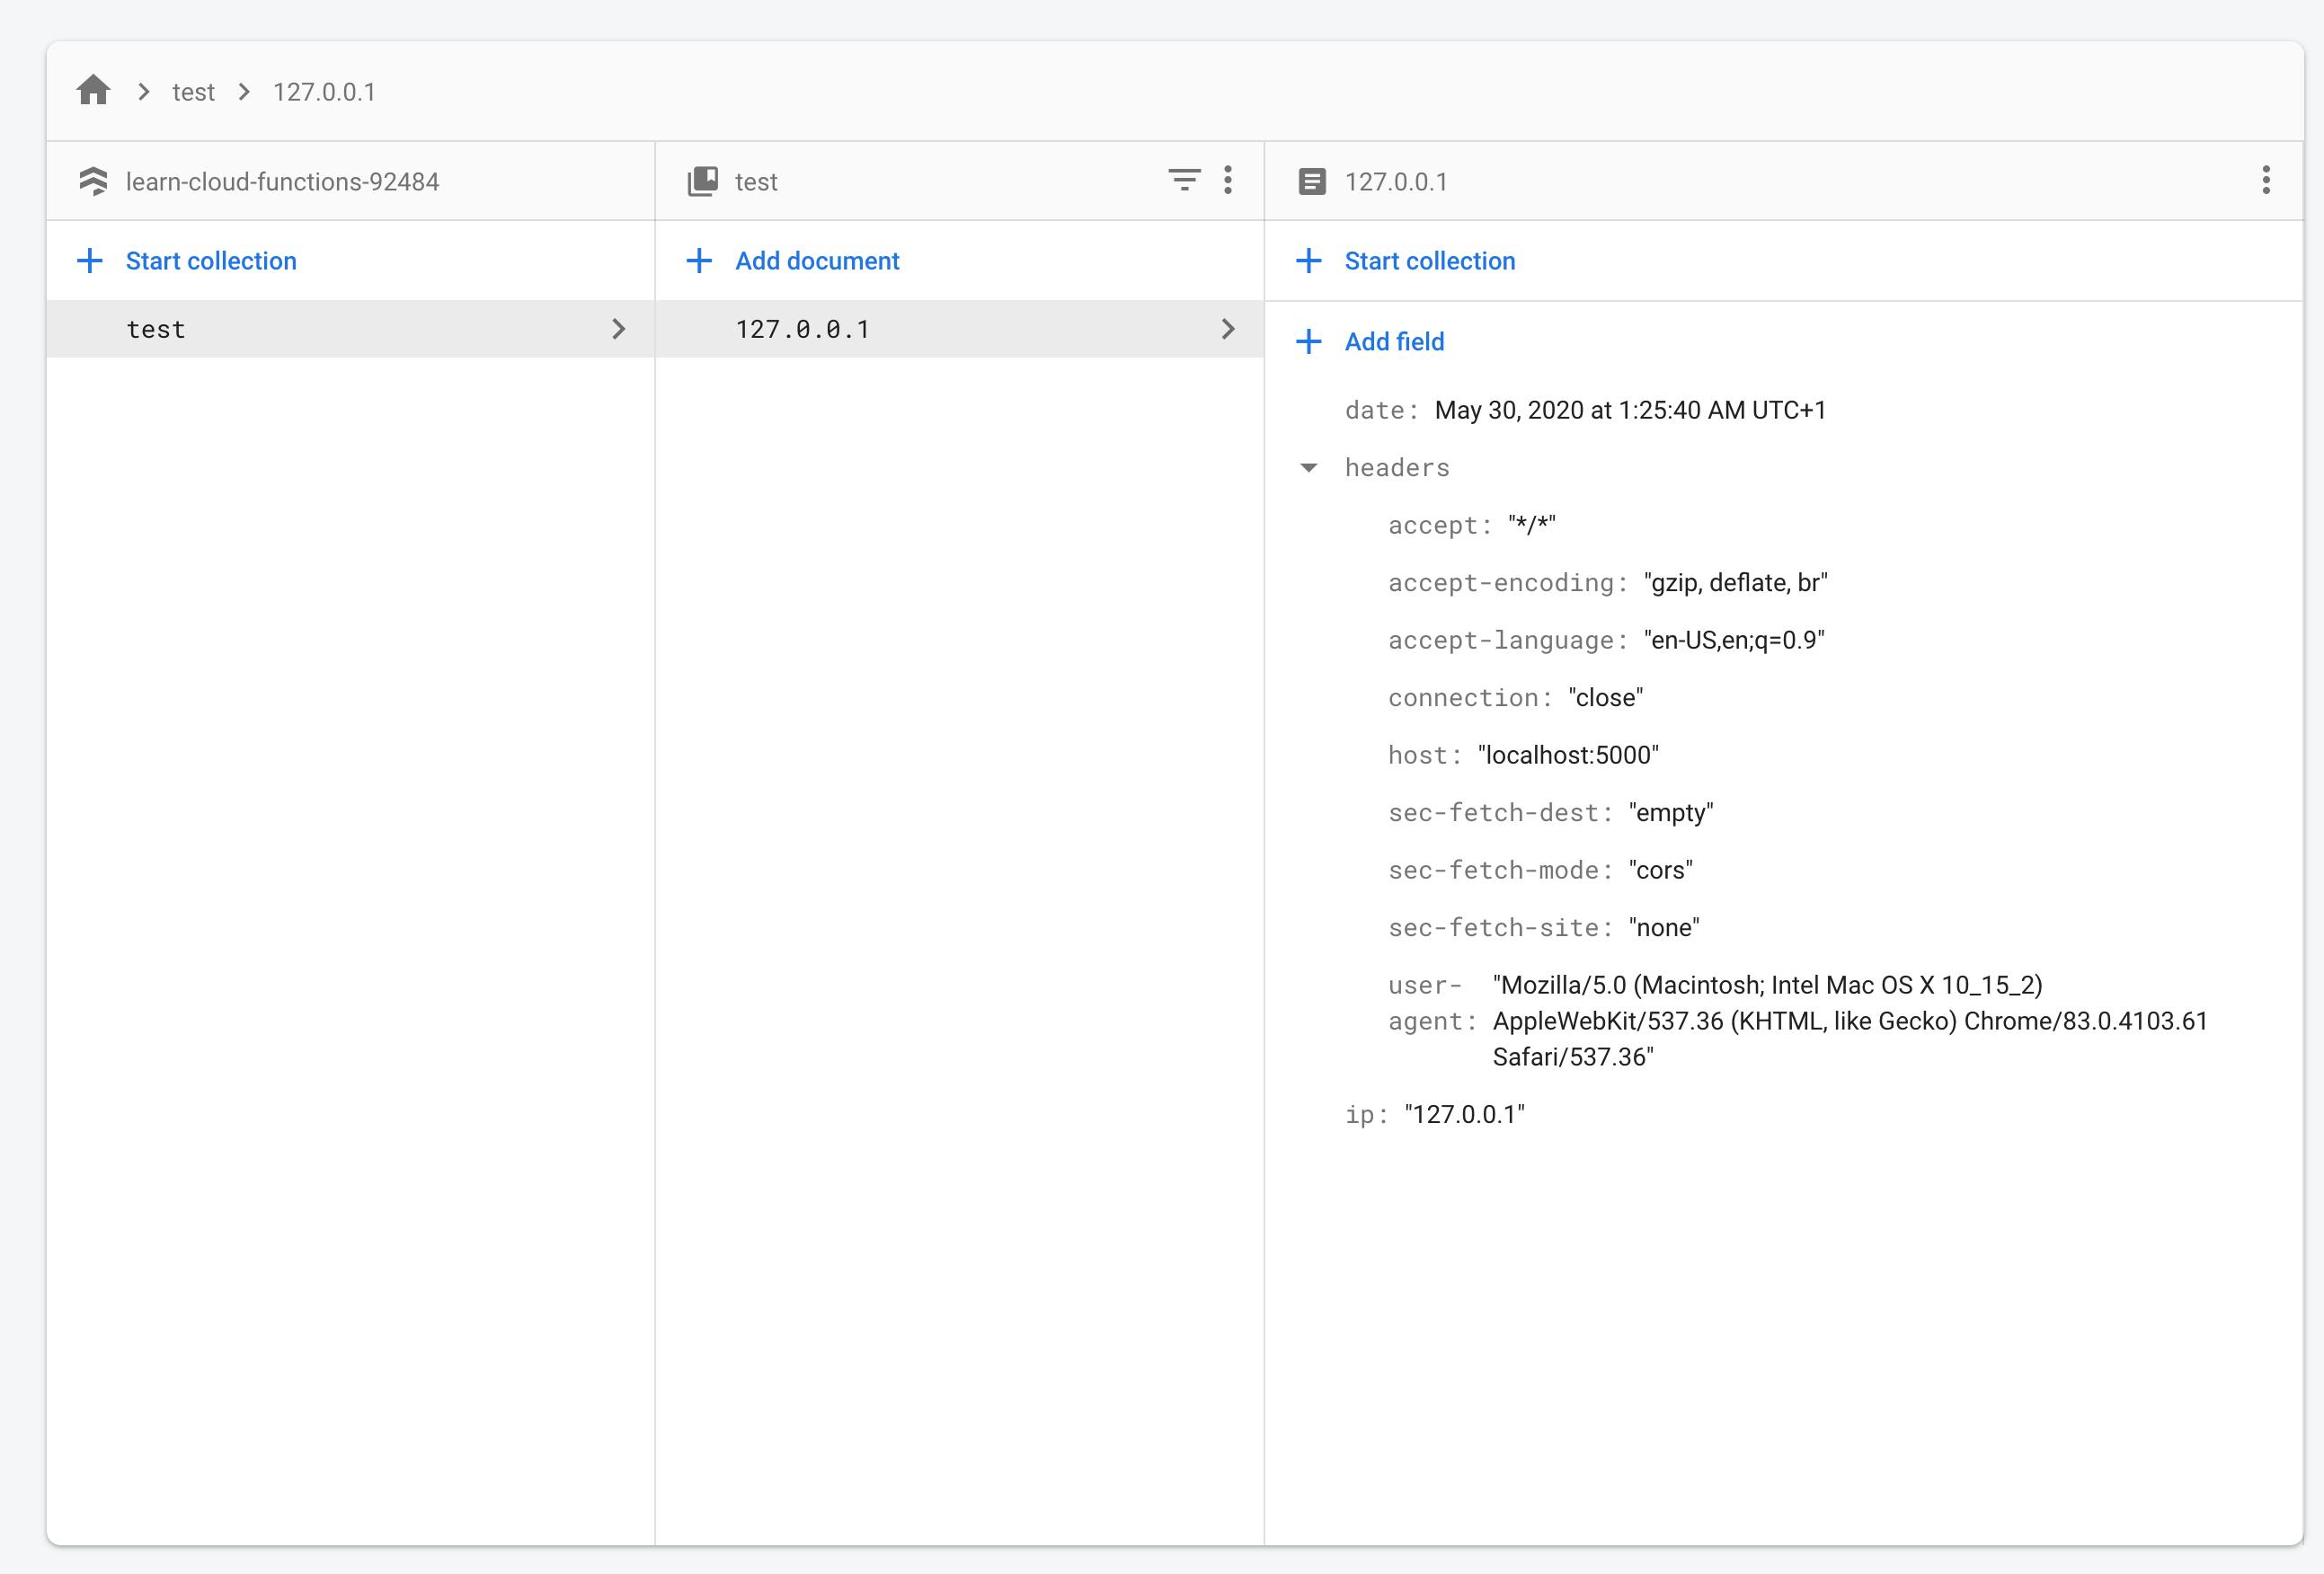
For every request, to the /helloWorld route, we want the route handler to save the request's ip and headers to the test collection using the request's ip address as the unique document id .
// functions/src/index.ts

import * as firebaseAdmin from "firebase-admin"; // import the firebase-admin sdk
import * as functions from "firebase-functions";
import * as express from "express";
import * as serviceAccount from "./serviceAccount.json";

// initialize the express framework
const app = express();

// grant the firebase-admin sdk all administrative privileges to our project
const firebase = firebaseAdmin.initializeApp({
  credential: firebaseAdmin.credential.cert({
    projectId: serviceAccount.project_id,
    clientEmail: serviceAccount.client_email,
    privateKey: serviceAccount.private_key,
  }),
});

app.get("/helloWorld", async (req: express.Request, res: express.Response) => {
  try {
    await firebase.firestore().collection("test").doc(req.ip).set({
      ip: req.ip,
      headers: req.headers,
      date: new Date(),
    });
    res.send("Document written");
  } catch (error) {
    res.send(error);
  }
});

//hookup our http function to respond with the express framework
export const api = functions.https.onRequest(app);
In your terminal, restart the server with npm run serve, visit the helloWorld route in your browser, you should notice that it took a while to get a response as compared to when we did not have a database operation. if you get the Document written response,
it means the operation was successful. Navigate to the database section of your project dashboard, you should see the data you just wrote and it should look similar to the screenshot below.
Hint: You may need to refresh the browser window, if you cannot see the data.
Onwards to our API...
Our API is going to be a simple users resource with the following routes.
GET /users  -  returns all the users in the database
POST /users -   adds a new user to the database
GET /users/:id  - returns a user by id
PATCH /users/:id - updates a user by id
DELETE /users/:id - deletes a user by id
In functions/src folder, create a router.ts file, this file will hold all of our route definitions.
// functions/src/router.ts
import * as express from "express";
import * as firebaseAdmin from "firebase-admin";
import { nanoid } from "nanoid";

export const initialize = () => {
  const router = express.Router();
  const db = firebaseAdmin.firestore(); // it feels inefficient to write firebaseAdmin.firestore everytime

  //GET /users  -  returns all the users in the database
  router.get("/users", async (_req: express.Request, res: express.Response) => {
    try {
      const usersCollectionReference = db.collection("users");
      const usersSnapshot = await usersCollectionReference.get();
      const users = usersSnapshot.docs.map((doc) => ({
        id: doc.id,
        ...doc.data(),
      }));
      res.status(200).send({ users });
    } catch (error) {
      res.send(error);
    }
  });

  // POST /users -   adds a new user to the database
  router.post("/users", async (req: express.Request, res: express.Response) => {
    try {
      const { firstName, lastName, email } = req.body;

      if (!firstName || !lastName || !email) {
        res.status(400).send({ message: "Missing fields" });

        return;
      }
      await db.collection("users").doc(nanoid()).set({
        firstName,
        lastName,
        email,
      });
      res.status(201).send({ message: "Created a new User", success: true });
    } catch (error) {
      res.send(error);
    }
  });

  // GET /users/:id  - returns a specific user by id
  router.get(
    "/users/:id",
    async (req: express.Request, res: express.Response) => {
      try {
        const { id } = req.params;
        const userDocumentReference = db.collection("users").doc(id);
        const userDocumentSnapshot = await userDocumentReference.get();

        if (!userDocumentSnapshot.exists) {
          res
            .status(404)
            .send({ message: `User with id=${id} does not exist` });

          return;
        }
        const userDocument = {
          id: userDocumentSnapshot.id,
          ...userDocumentSnapshot.data(),
        };
        res.status(200).send({ user: userDocument });
      } catch (error) {
        res.send(error);
      }
    }
  );

  //  PATCH /users/:id - updates a specific user
  router.patch(
    "/users/:id",
    async (req: express.Request, res: express.Response) => {
      try {
        const { id } = req.params;
        const userDocumentReference = db.collection("users").doc(id);
        await userDocumentReference.update({ ...req.body });
        res.status(200).send({ message: "User updated", success: true });
      } catch (error) {
        res.send(error);
      }
    }
  );

  // DELETE /users/:id - deletes a specific user
  router.delete(
    "/users/:id",
    async (req: express.Request, res: express.Response) => {
      try {
        const { id } = req.params;
        const userDocumentReference = db.collection("users").doc(id);
        await userDocumentReference.delete();
        res.status(200).send({ message: "User Deleted", success: true });
      } catch (error) {
        res.send(error);
      }
    }
  );

  return router;
};
Firestore saves data in collections, and ensures each document in the collection has a unique id , we use the nanoid npm package to generate a unique id for every document we insert into our database.
Install the nanoid npm package
npm install nanoid ---save
Now we update our functions/src/index.ts file.
// functions/src/index.ts

import * as firebaseAdmin from "firebase-admin"; // import the firebase-admin sdk
import * as functions from "firebase-functions";
import * as express from "express";
import * as serviceAccount from "./serviceAccount.json";
import * as router from "./router";

// grant the firebase-admin sdk all administrative privileges to our project
firebaseAdmin.initializeApp({
  credential: firebaseAdmin.credential.cert({
    projectId: serviceAccount.project_id,
    clientEmail: serviceAccount.client_email,
    privateKey: serviceAccount.private_key,
  }),
});

// initialize the express framework
const app = express();

// tell express server to use the router
app.use(router.initialize());

//hookup our http function to respond with the express framework
export const api = functions.https.onRequest(app);
A quick overview of Firestore queries
- To retrieve all the documents from a collection
const usersCollectionReference = firebase.firestore().collection("users");
The usersCollectionReference variable holds the reference to the users collection, so to retrieve the snapshot of the documents in the users collection, we need to call the async get method on the usersCollectionReference
const usersSnapshot = await usersCollectionReference.get();
The usersSnapshot which is one large object {} , contains all the information about our collection.
const users = usersSnapshot.docs.map(doc => doc.data());
The docs property on the userSnapshot is an array [] containing all the documents in our collection, so we map through the docs array, and we call the data method on each document to retrieve the document data.
- To retrieve a single document from a collection
const userDocumentReference = db.collection("users").doc(id);
const userDocumentSnapshot = await userDocumentReference.get();
const userDocument = userDocumentSnapshot.data();
The userDocumentReference variable holds the reference to a single user document not the entire users collection, to retrieve the document, we call the async get method on the userDocumentReference , since we are retrieving a single document, the userDocumentSnapshot contains the only the corresponding user's document, in order to access to the document's data, we need to call the data method just like we did before.
The same pattern can be used to create, update and delete a document in our collection.
userDocumentReference.set(..args) // creates a new document
userDocumentReference.update(..args) // updates an existing document
userDocumentReference.delete() // deletes a document
Firestore supports ranged based queries, conditional queries, ordering, pagination and other useful database operations. Check out the Firestore docs to harness the full power of Firestore.
Testing our APIs
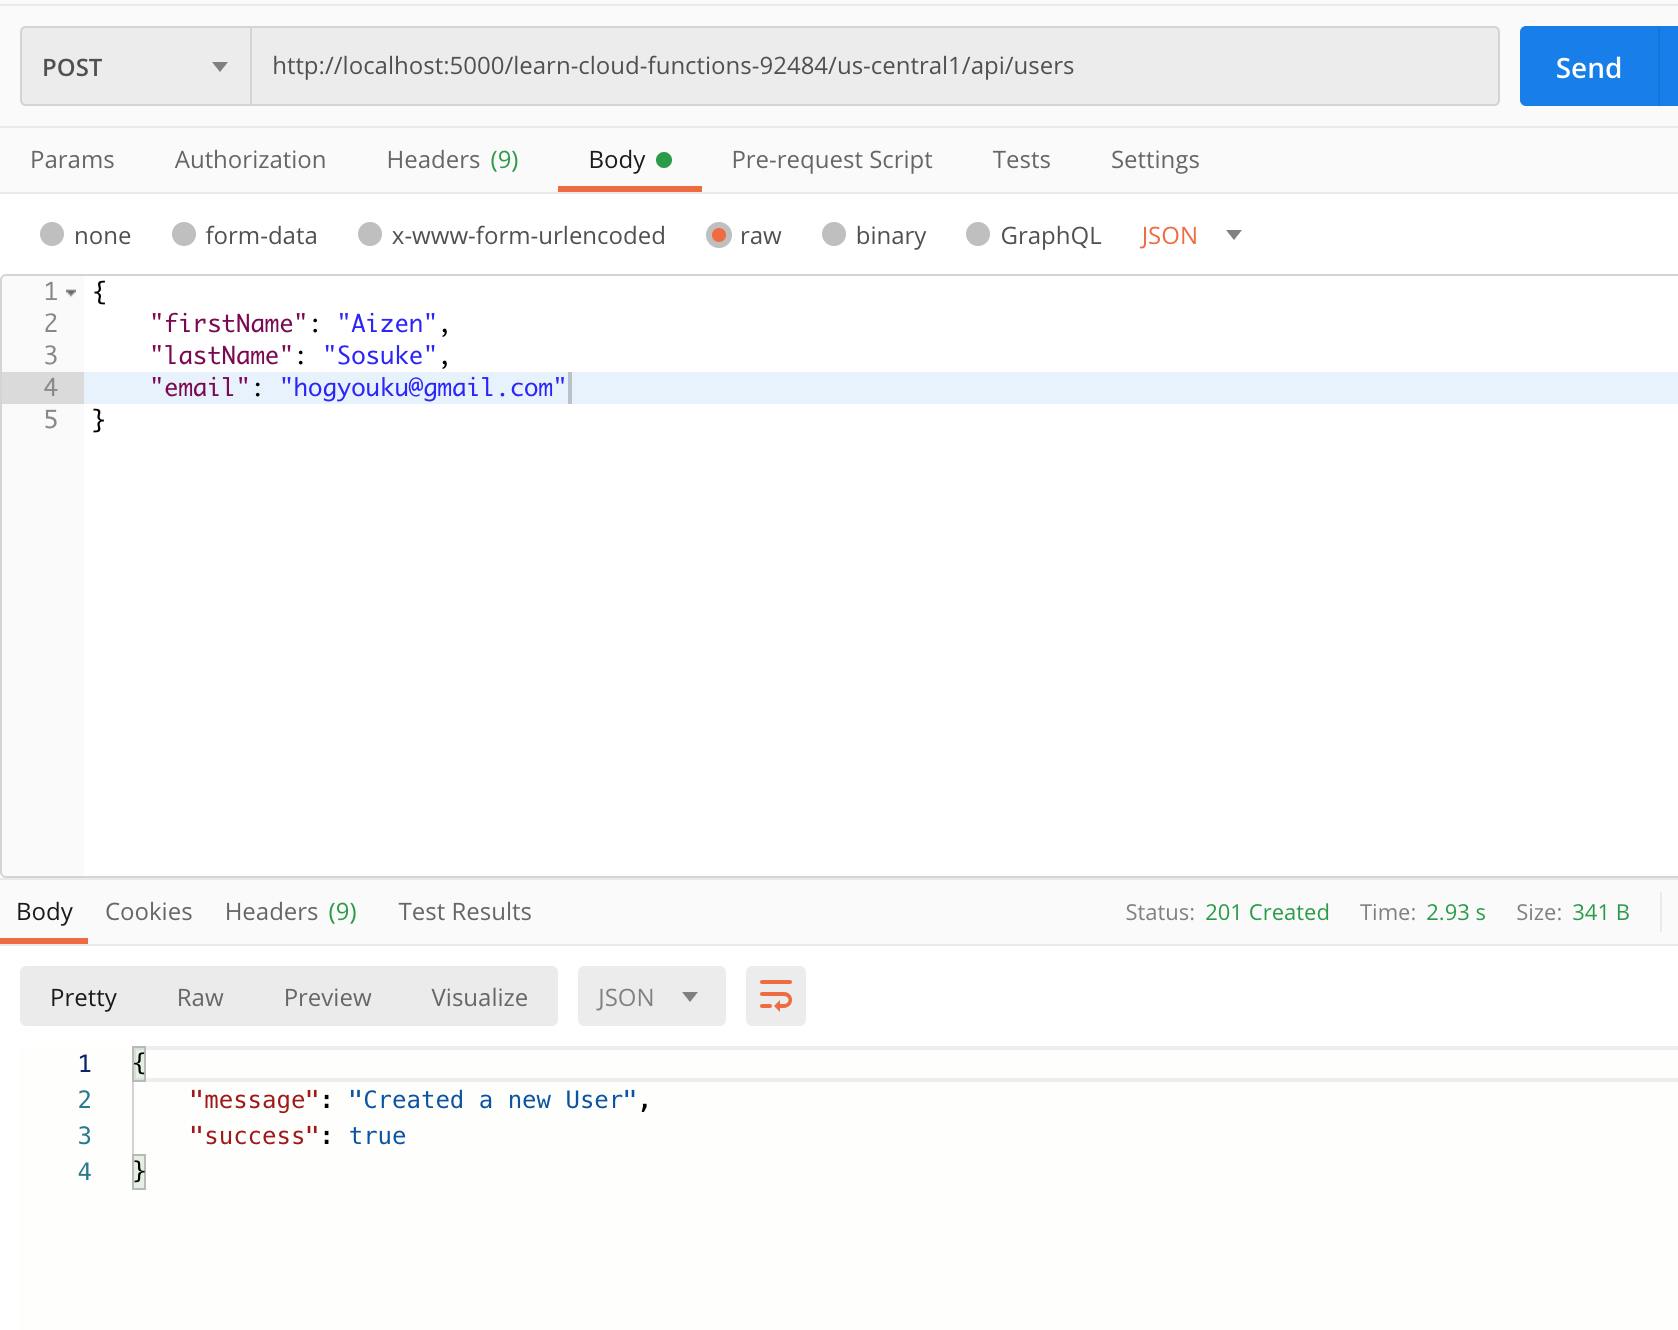
In order to verify that our API routes are working as intended, we need an API client to test our express server, traditional browsers can be used but they are not the best option especially when testing POST, DELETE and PATCH requests, our tool of choice is Postman as it is the most popular API development tool.
1. Creating a new user
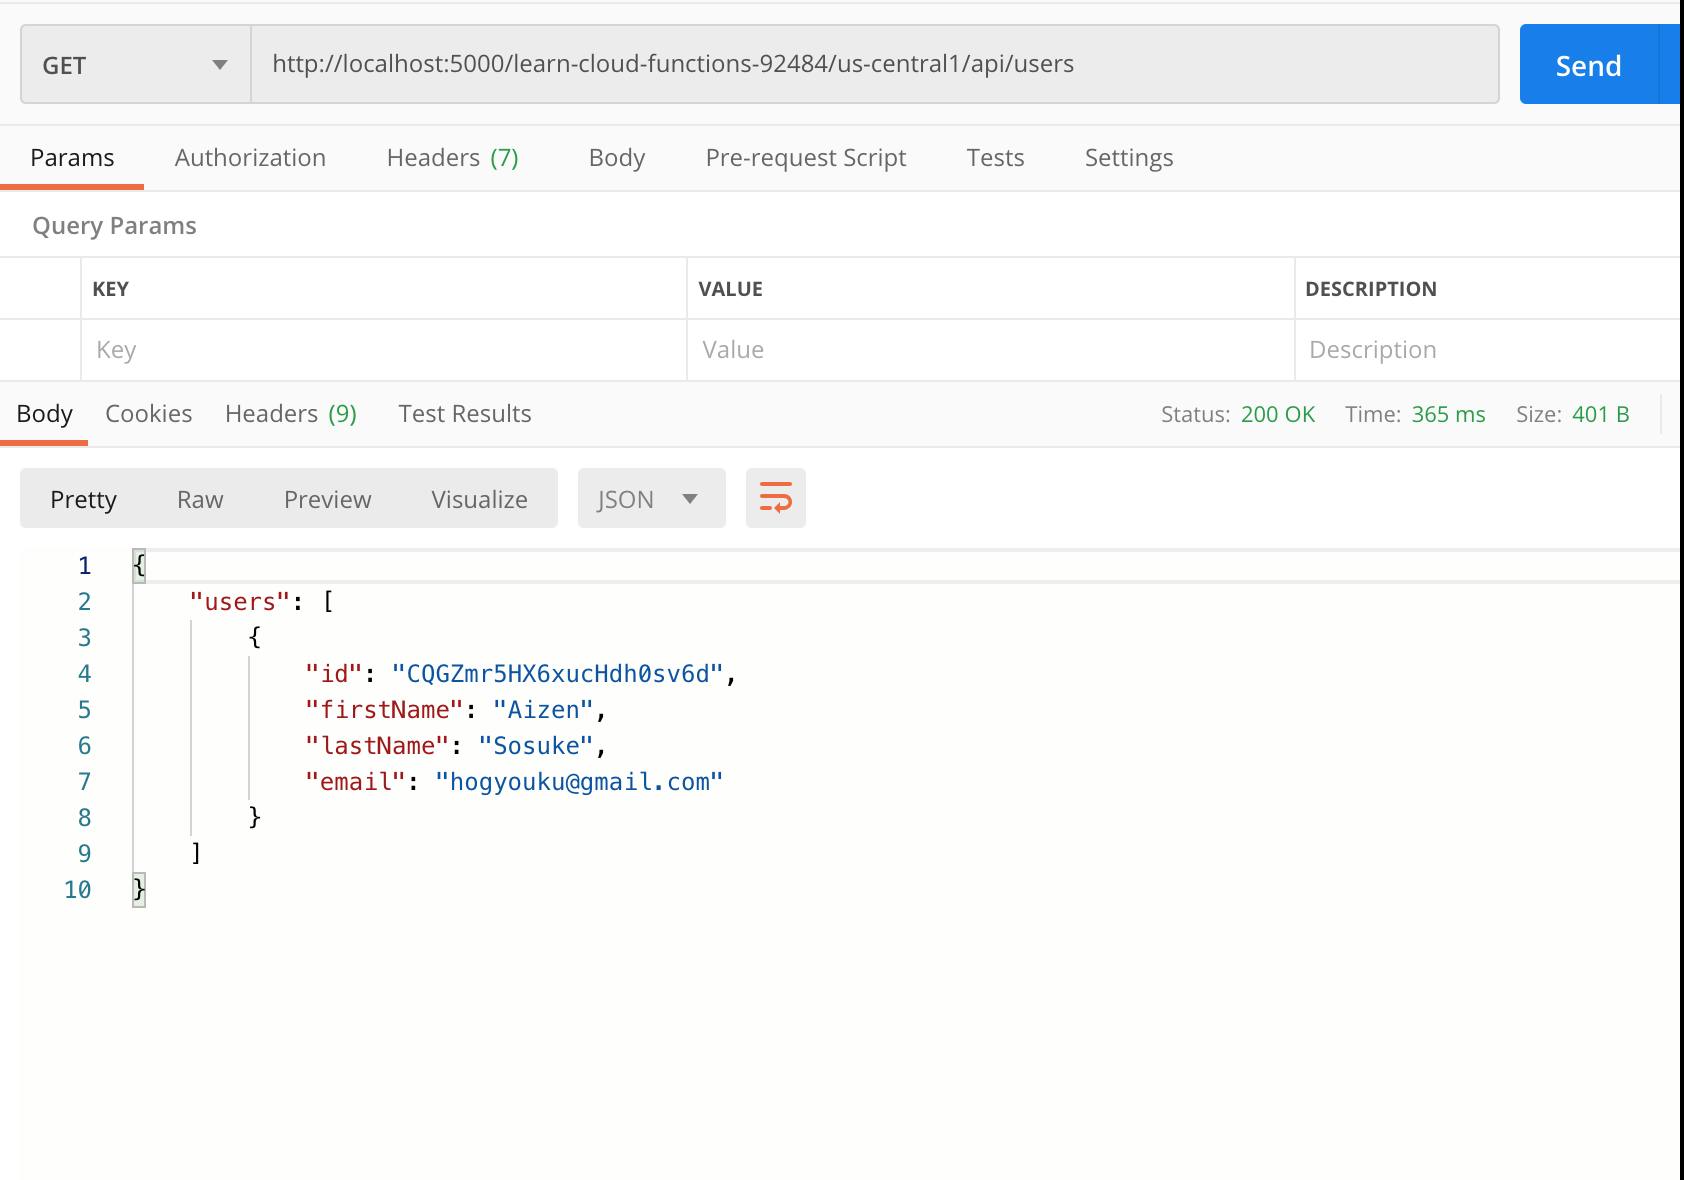
2. Retrieve all the users in our database
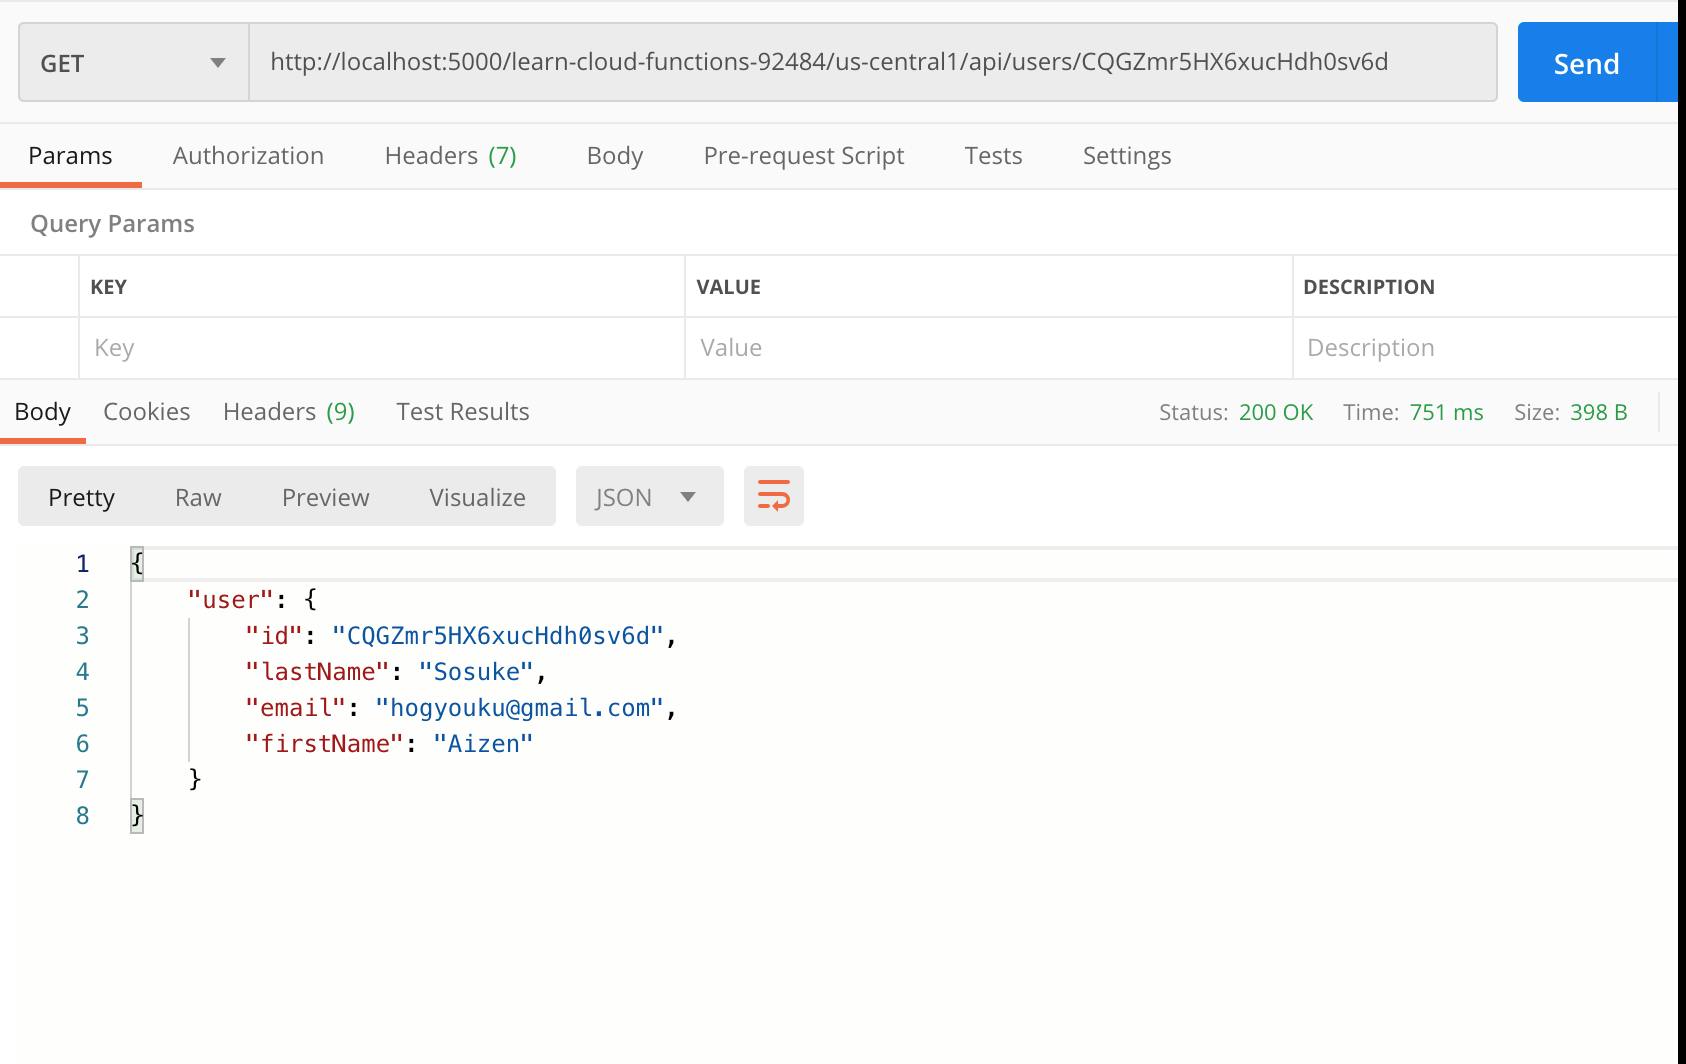
3. Retrieve a user by id
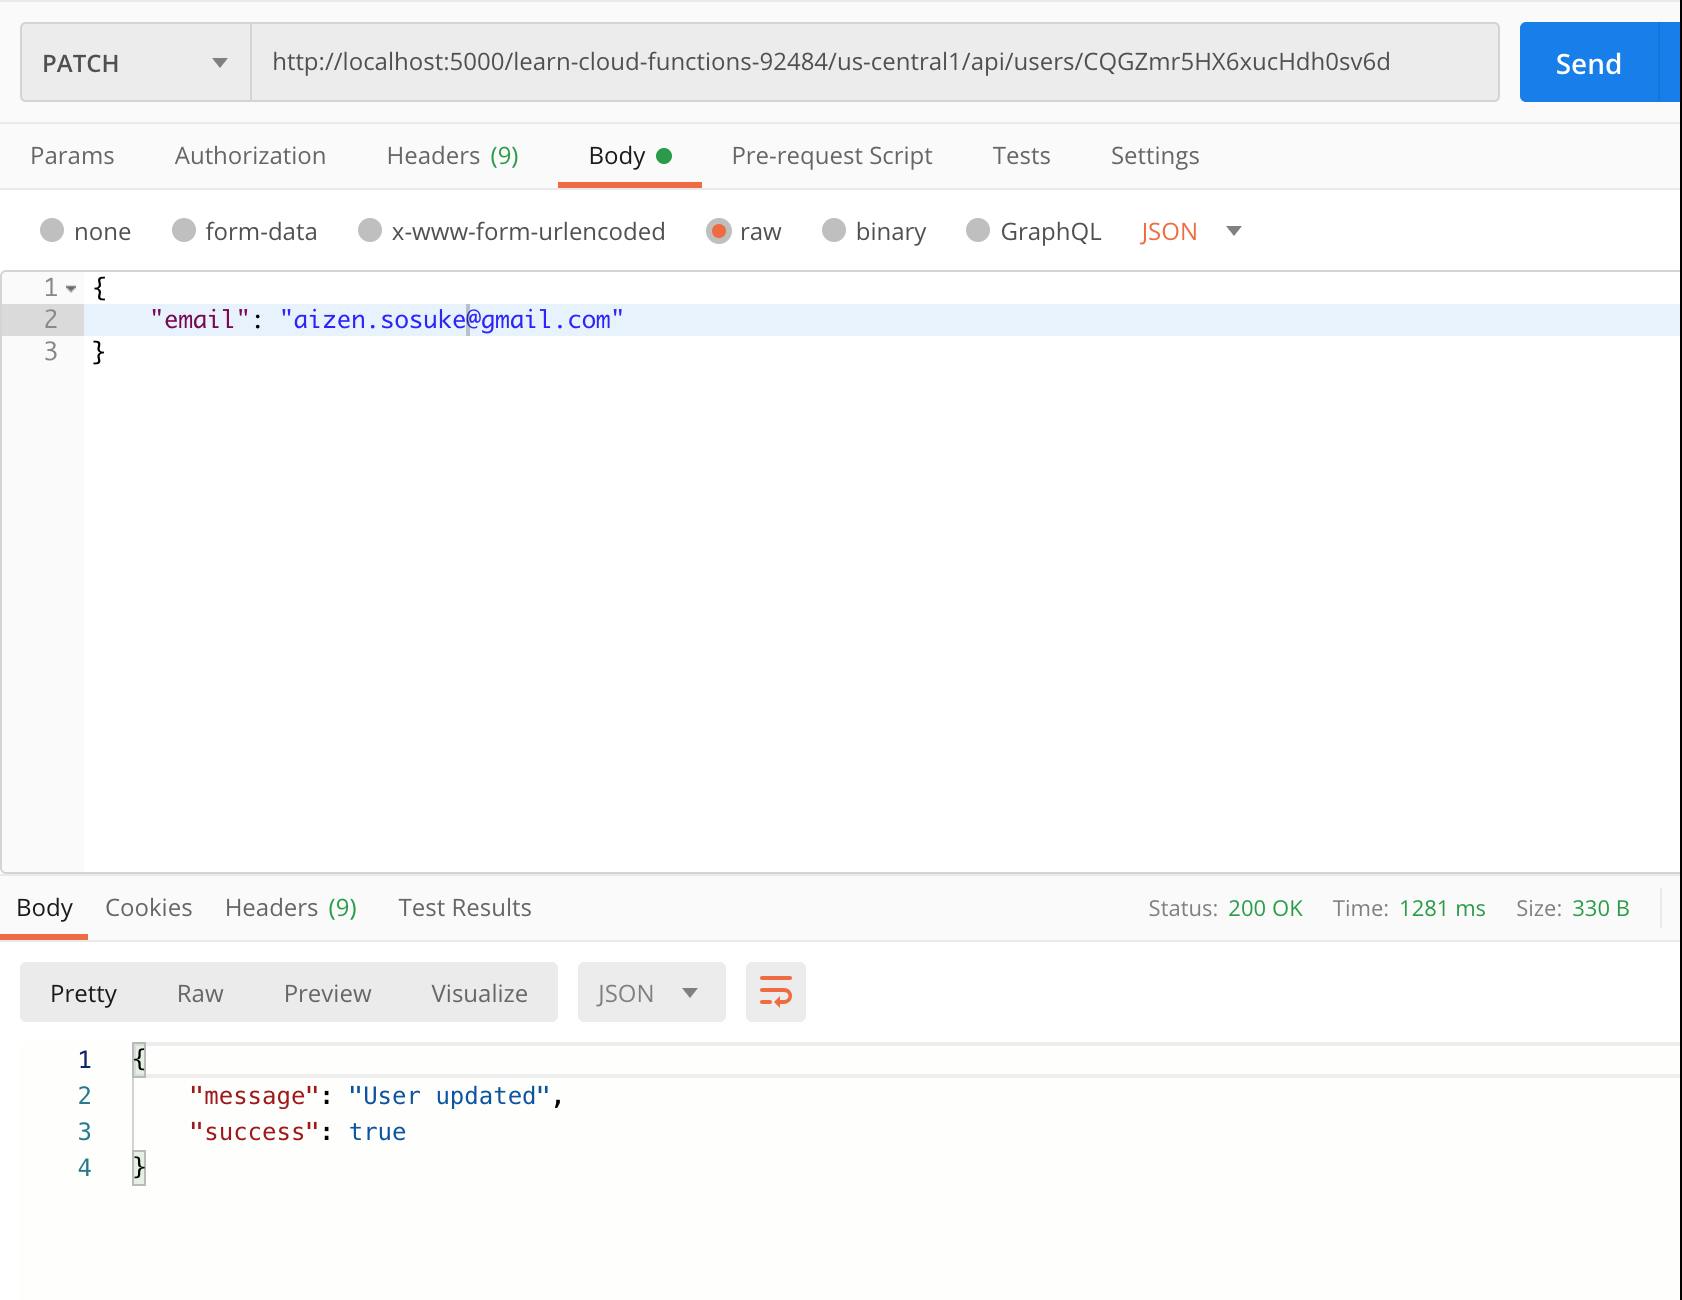
4. Update a user
5. Delete a user
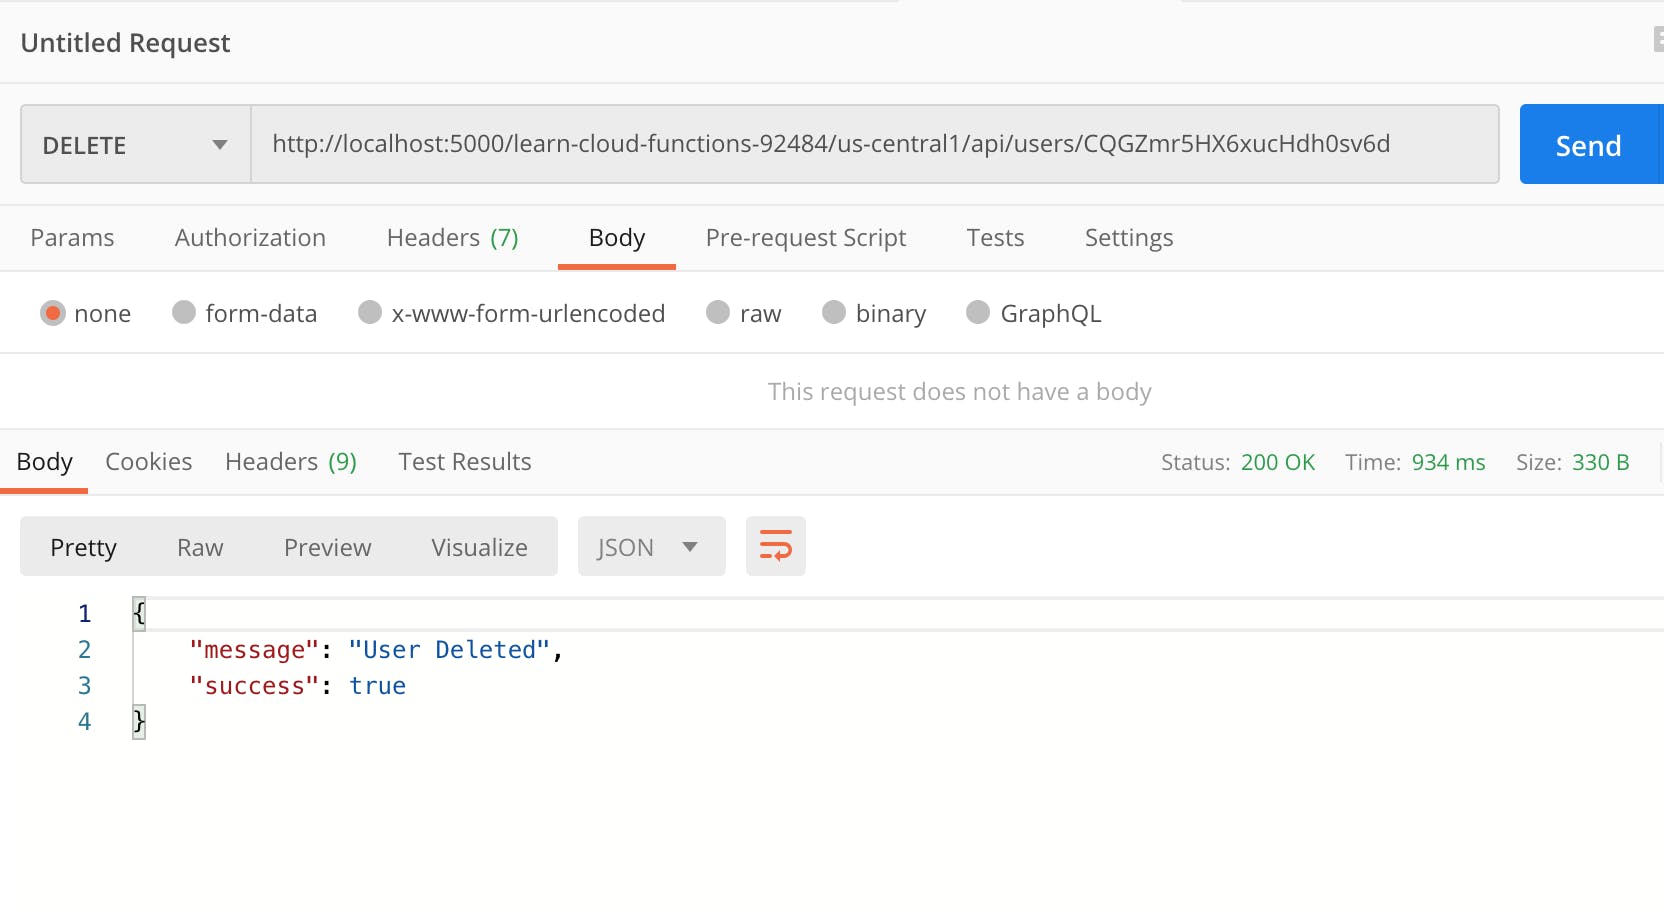
From the screenshots above, it can be seen that the API routes work as expected.
Deploying our cloud function.
We made it - it's time go live.
In your terminal from the functions directory, run the deploy command.
npm run deploy
if all goes well, the terminal output should be similar to the screenshot below.
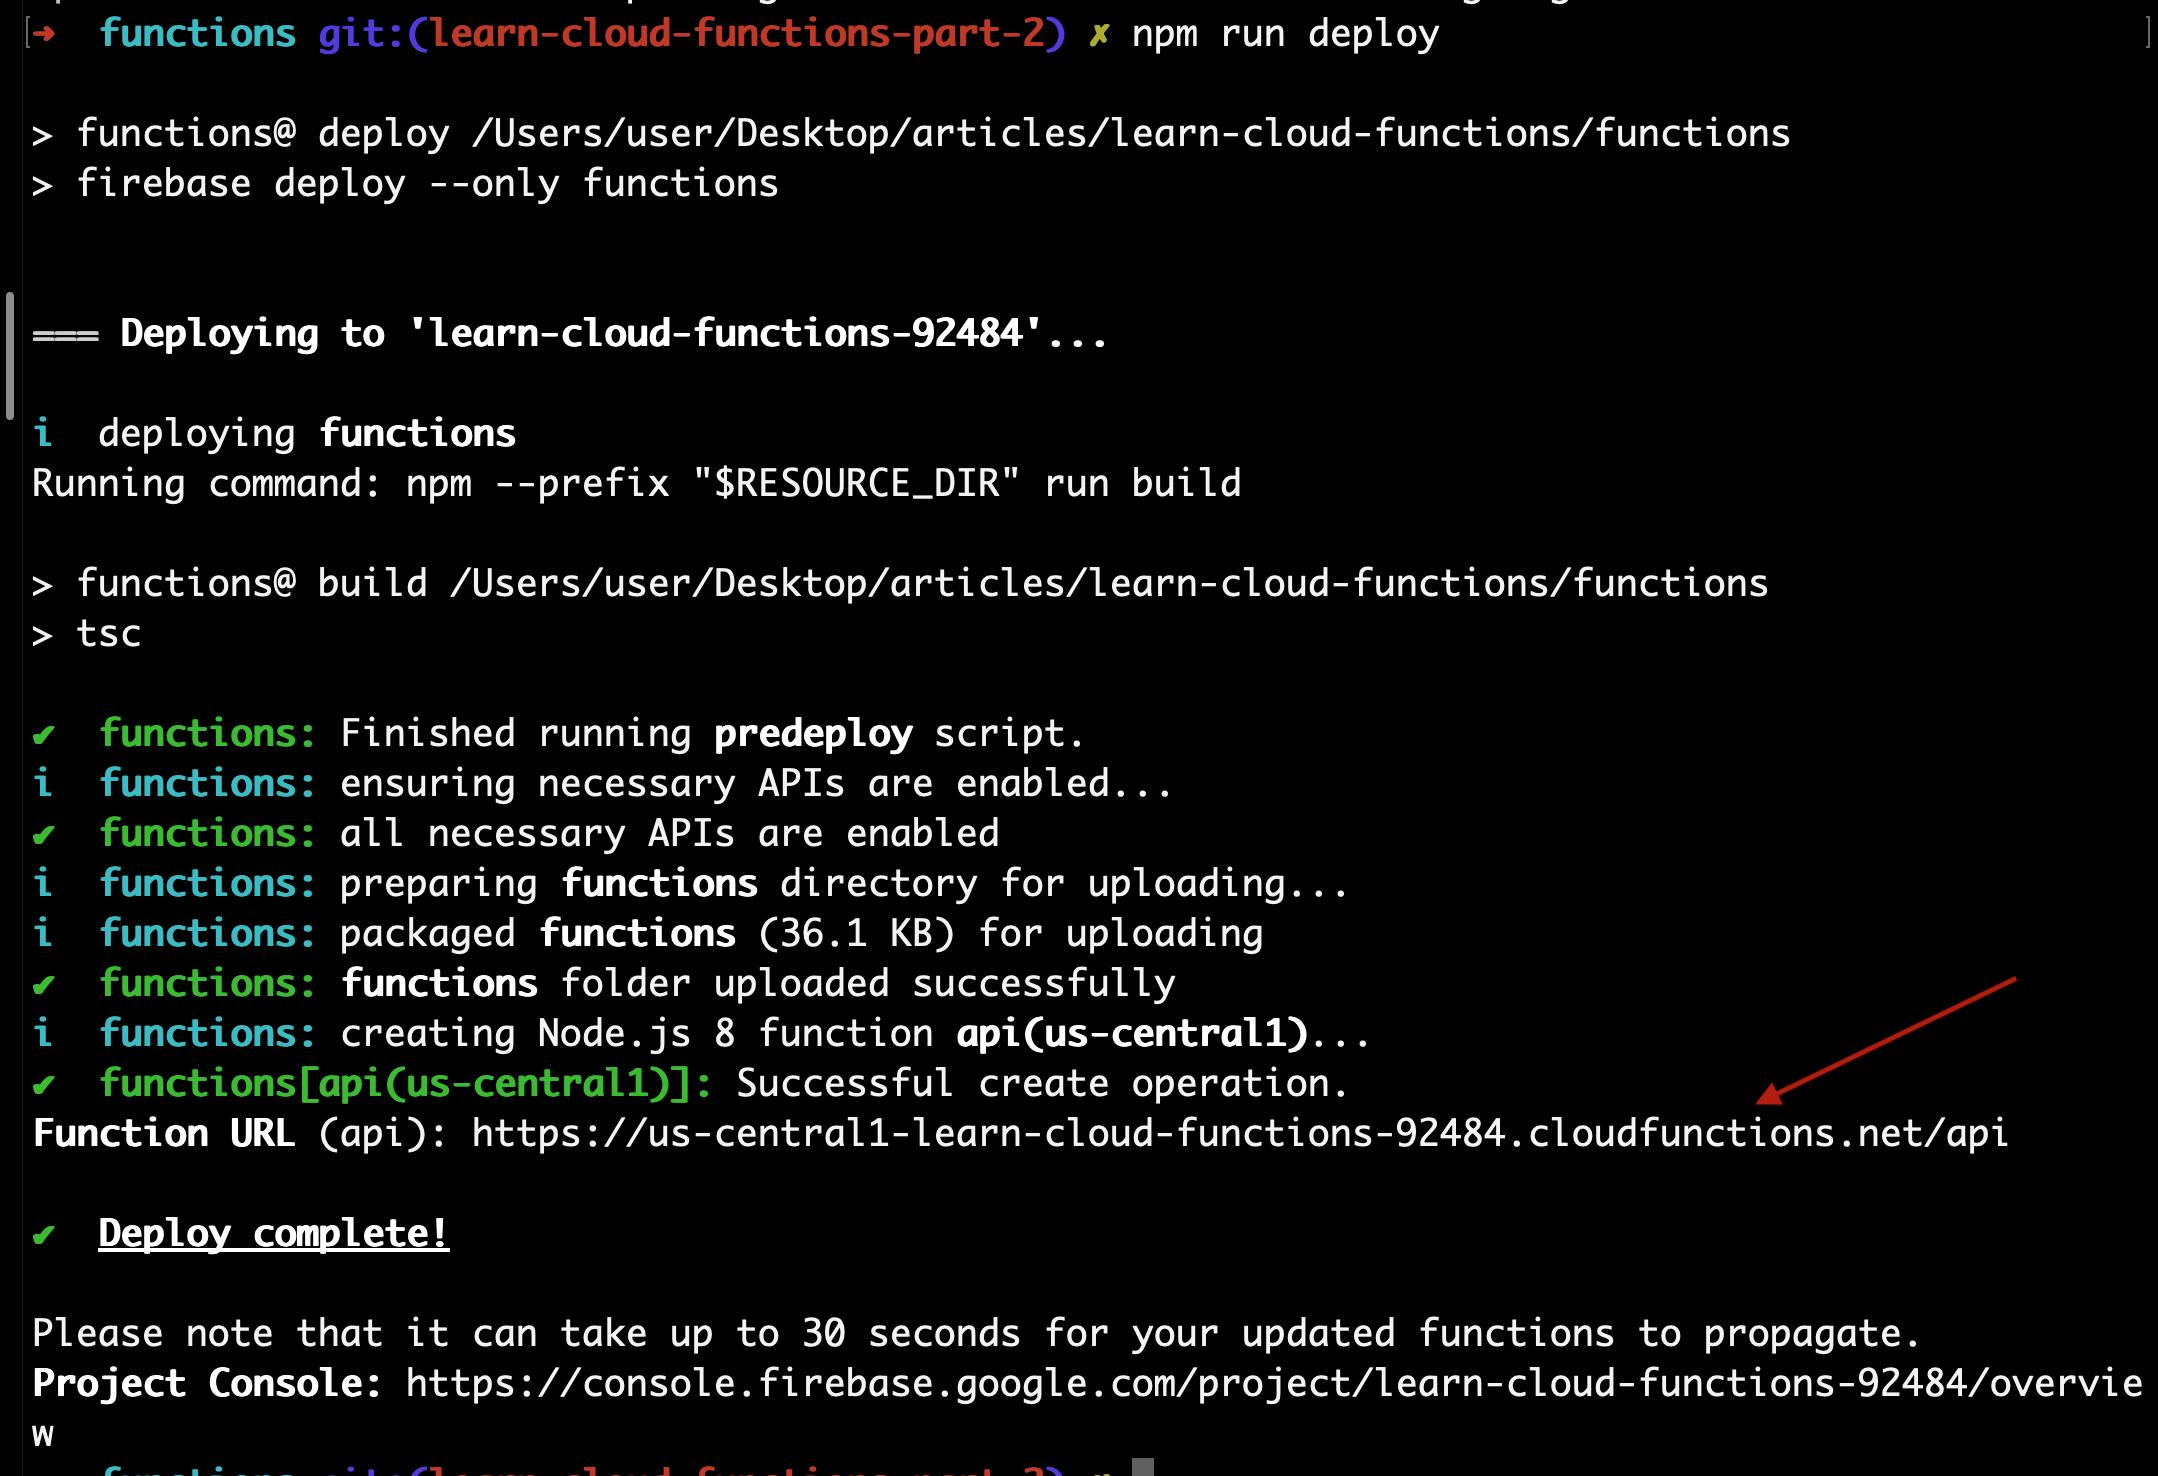
Now the function URL can be used to replace the localhost URL and everything should work normally.
Note: You may experience permissions issues after the function is deployed. This is Google's way of enforcing unauthorized users from accessing your function resources.
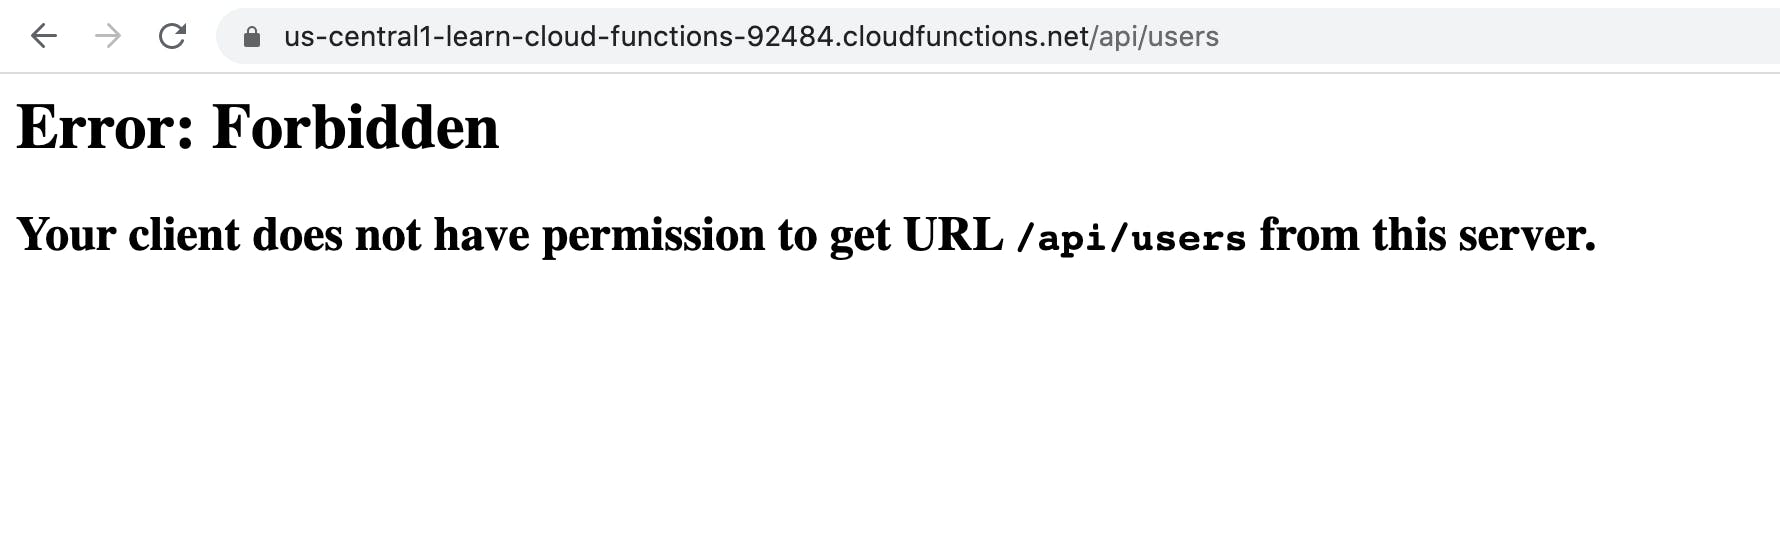
Since our API is intended for public consumption, we need to enable public access via the Google Cloud console dashboard.
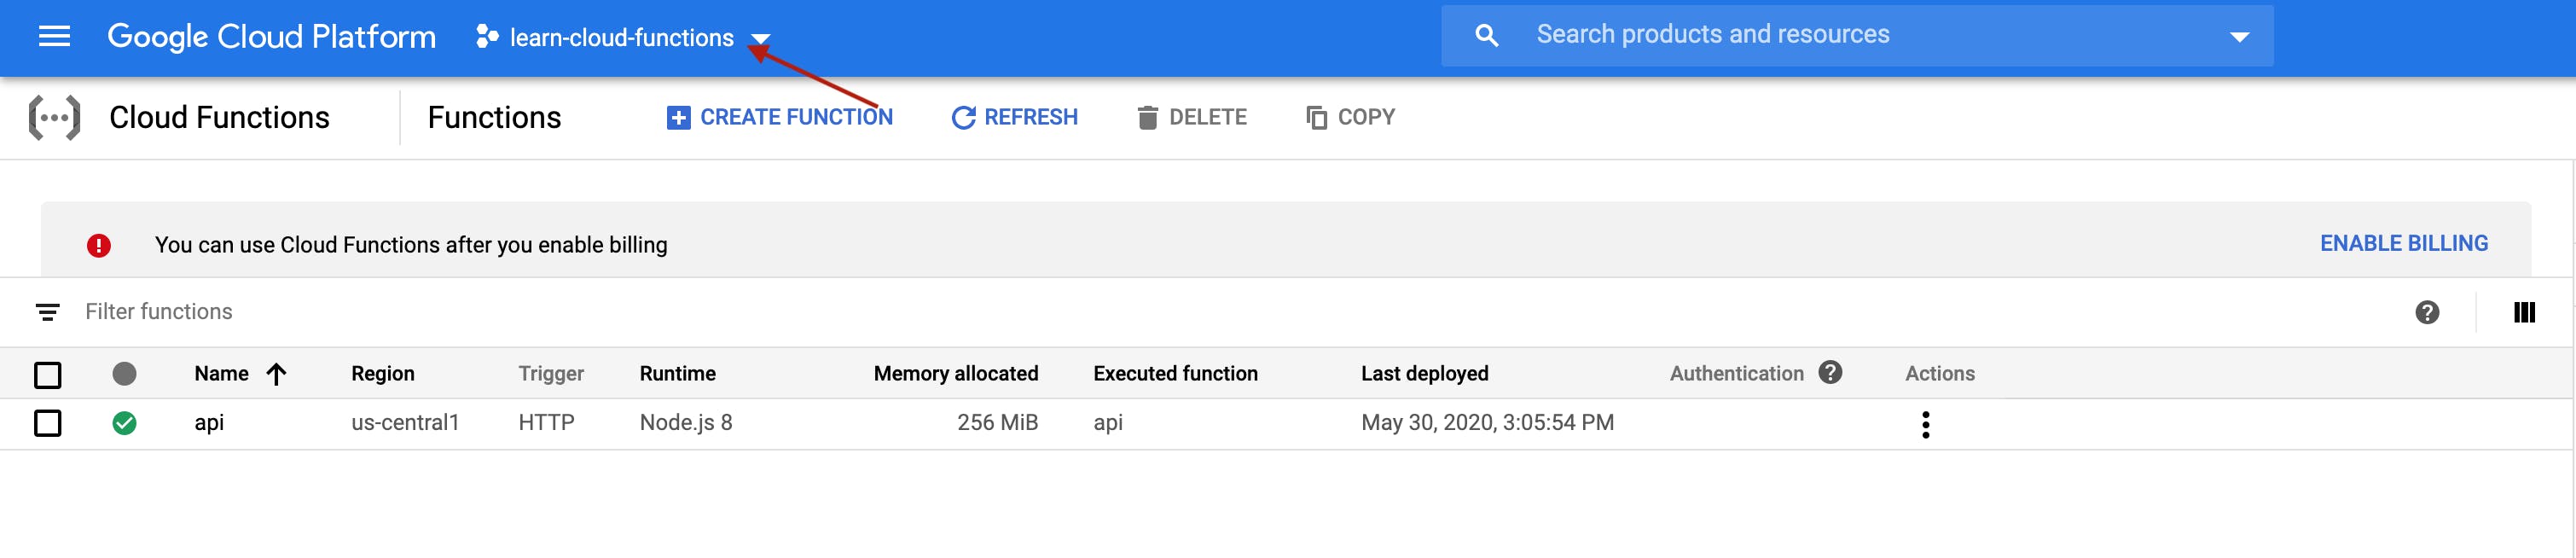
Navigate to the functions page of the dashboard, This will list the Cloud Functions currently available in your most recent project, you can use the dropdown to select the project you want to modify.
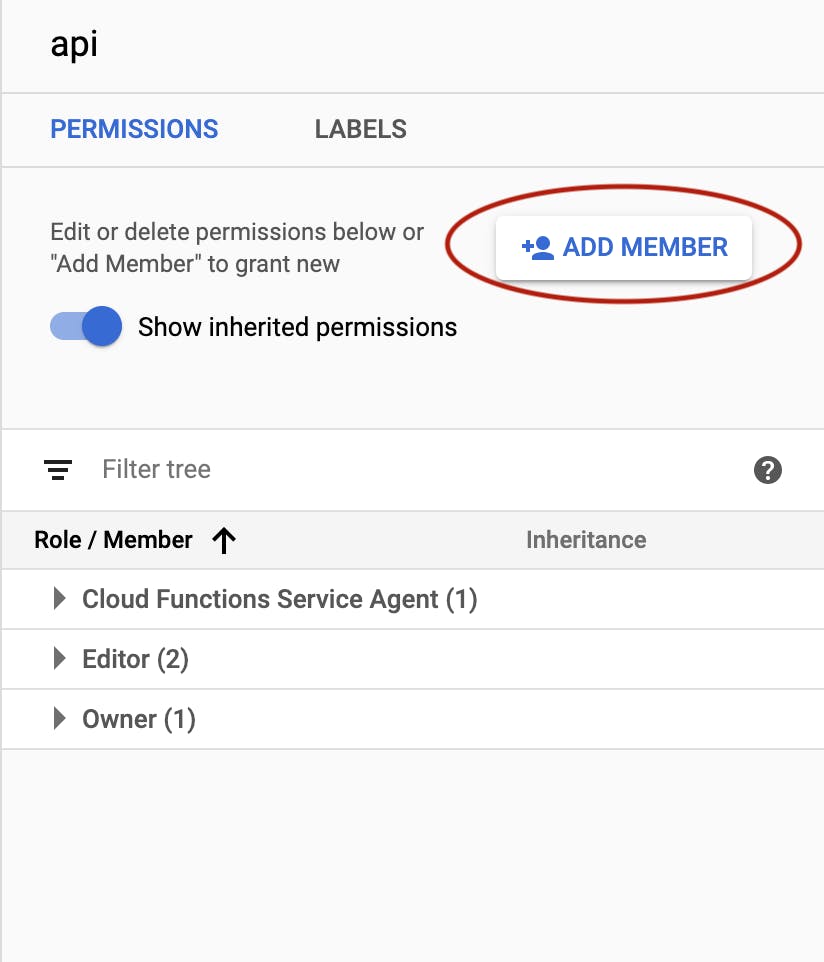
Select the api function via the checkbox, on the right side of the dashboard, Select the Add member option.
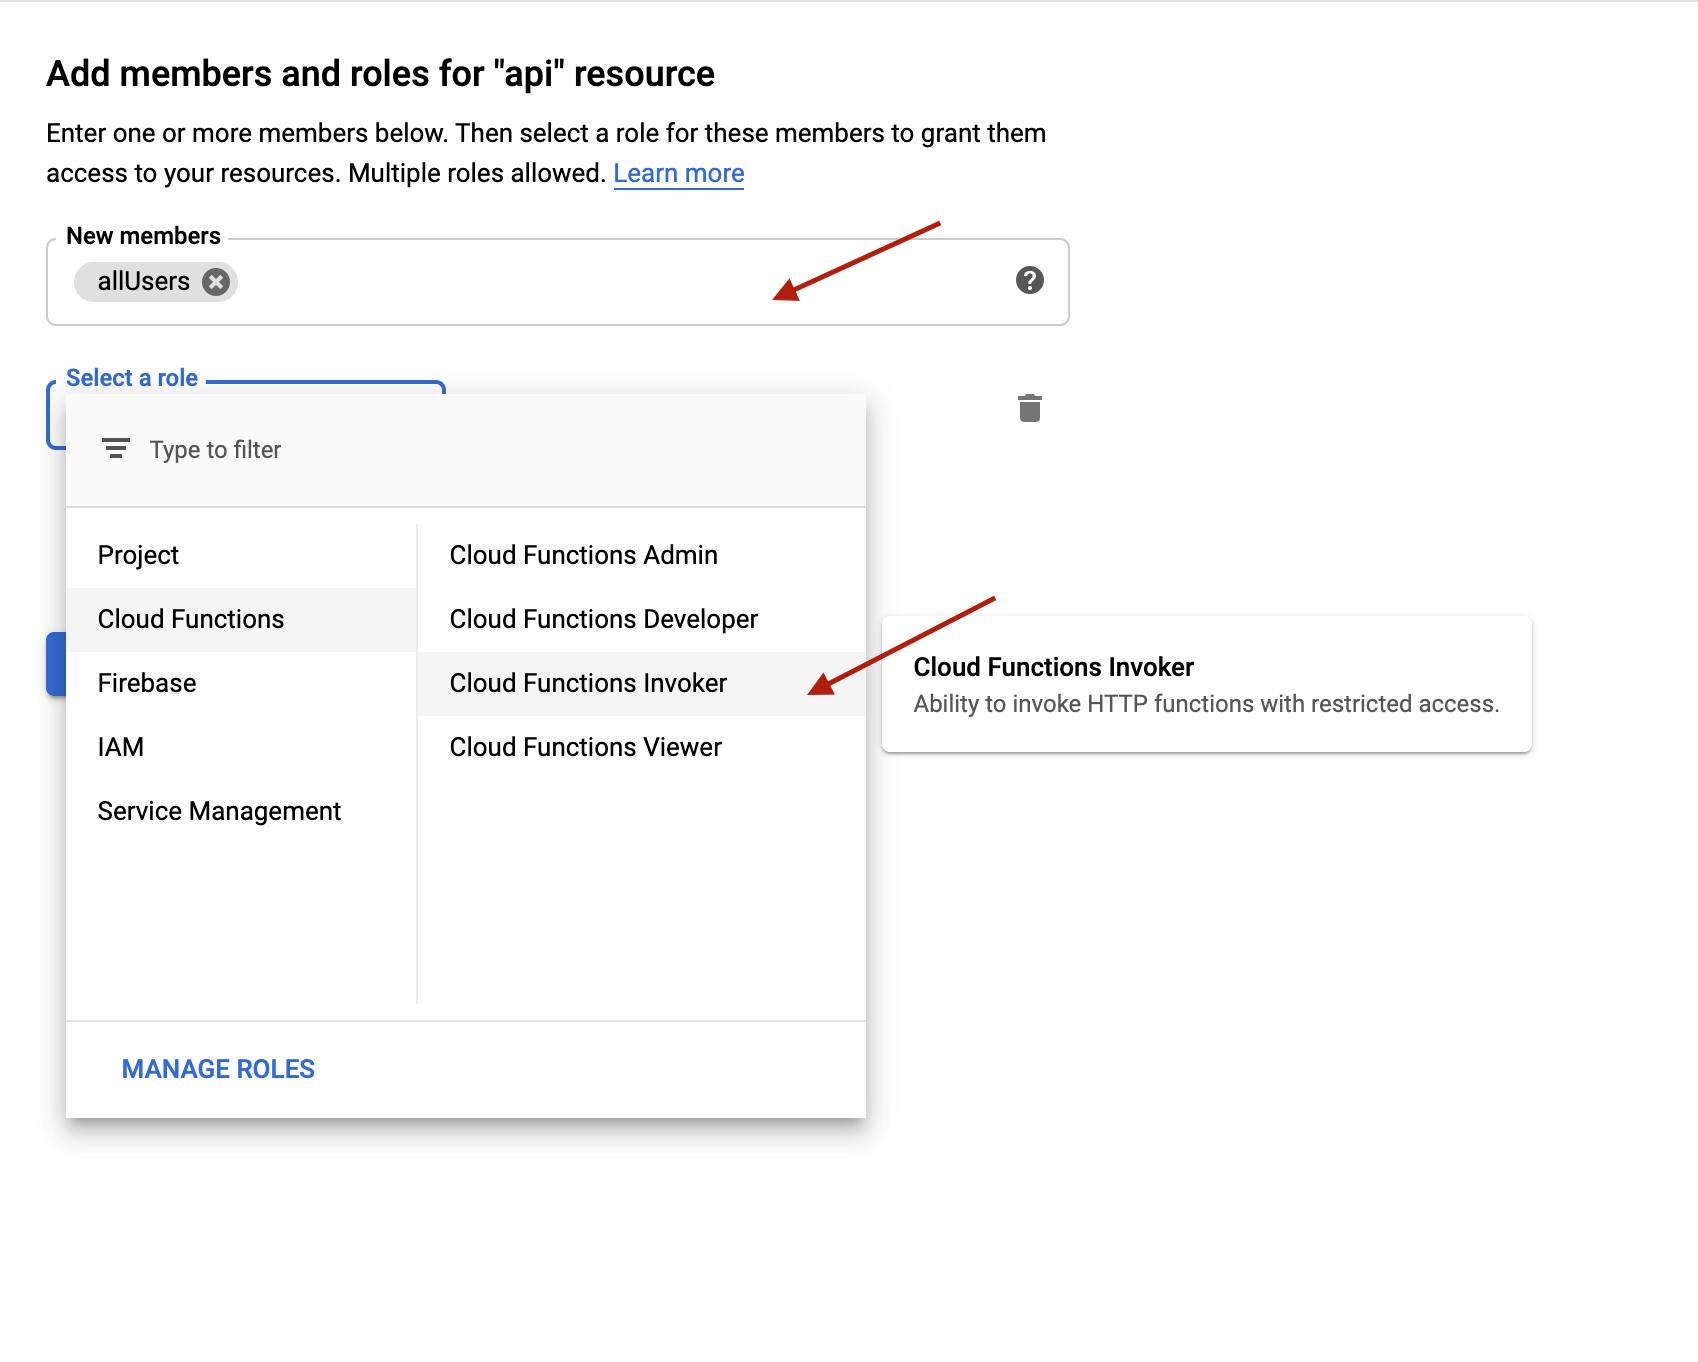
Add a new member with name allUsers and set the role as Cloud Functions Invoker, then Save.
When the dialog pops up, select the Allow Public Access option.
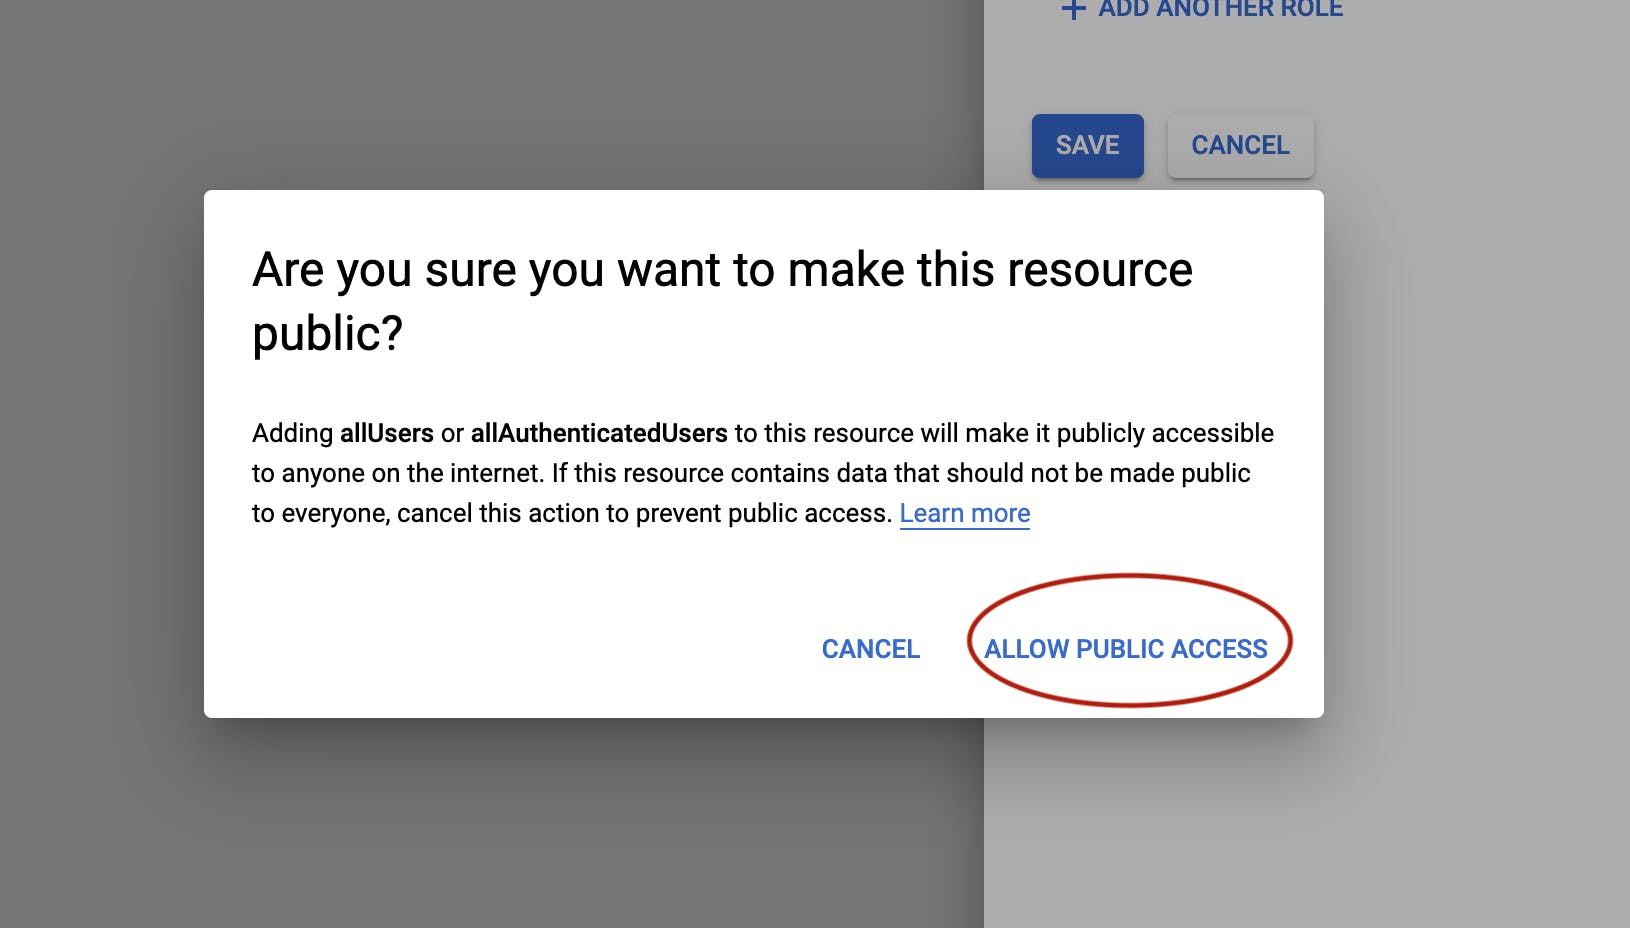
This should make the api available the public consumption.
This is the link to the source code on Github. The linked source code reflects the state of the repository as at this point in the series.
In Part 3, we'll be exploring how to run functions when a change a happens in our database.
If you have any question or comment, please let me know in the comments section.
Cover image credits: medium.com/@alfianlosari 👏 👏 👏